Project Exposing An Antique Brick Wall -Chapter 2
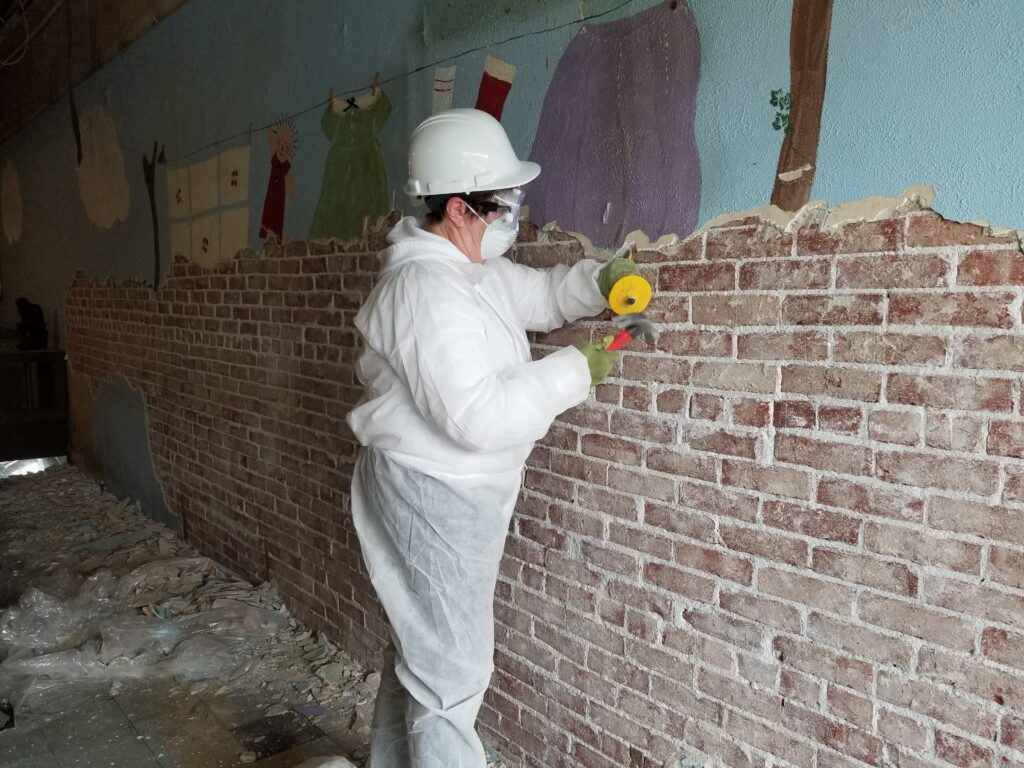
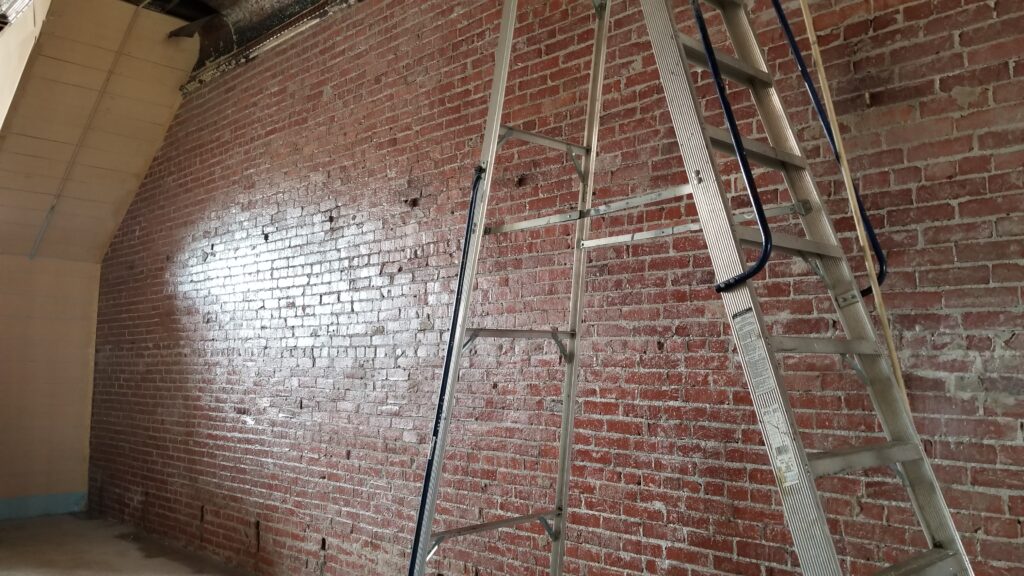
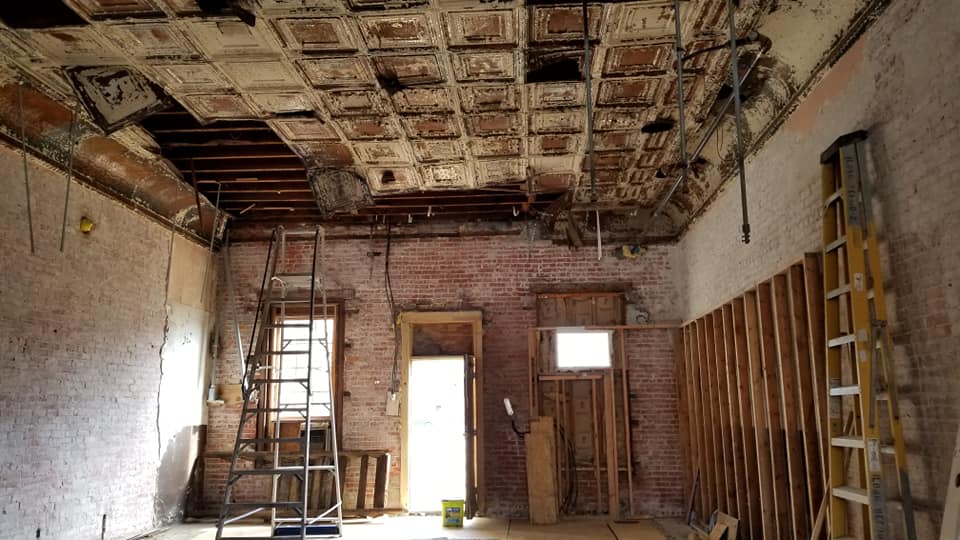
In Project Exposing an Antique Brick Wall: Chapter 1, I showed you where we started, how we recruited help from loved ones, and the labor intensive process it was exposing the brick. In this post, I will show you how we cleaned up the raw brick and sealed them, leaving a gorgeous raw brick look without the dust!
Building Our Dream Home
Am I Completely Nuts?
What makes a young twenty something girl decide to take on a renovation project of this magnitude? I mean, there are home projects like adding trim or painting your kitchen cabinets but THIS…THIS IS A BEAST of a project…like a lifetime legacy kind of project. Not to dismiss painting your kitchen cabinets. I have done this in my first home. It takes a lot of work and patience too but not over 13 years… In the blog post, Restoring Our Antique Ceiling Tiles: Part 1, I briefly talked about how this whole crazy idea started.
My Little Slice of the American Dream
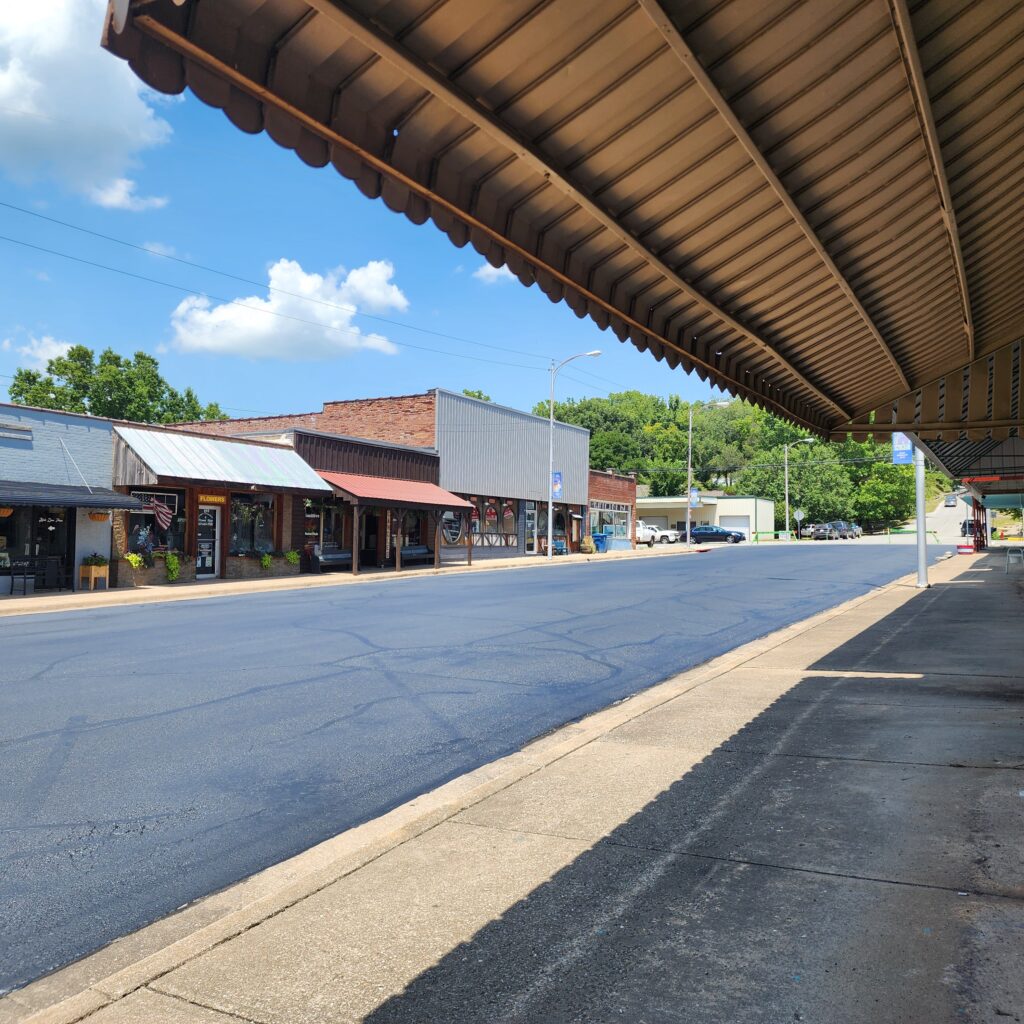
I love our Manor. It is in a quaint little scenic town in the Midwest. The town is like a little Mayberry. Everyone knows each other and shouts “Good Morning” when you are walking down the street. It is just a really friendly community and everyone supports each other.
We are located next to a beautiful county library, delicious food is within walking distance, a coffee shop is RIGHT ACROSS THE STREET (I am in trouble 😂), a beautiful floral shop to buy fresh flowers , several antique stores and boutiques (Including my FAVORITE one!) , a neat shop that uses lasers to create gorgeous custom pieces, and even a nail salon in my backyard. It is nestled in the hills of the Ozark Mountains so my views from our future home are beautiful! Our park has a beautiful creek that runs through it with fishing and hiking trails. I also have the blessing of amazing small town festivals and parades throughout the year right at my doorstep. For me, this is perfection. This is HOME!
I know I will not get to have certain things like my own milk cow or a massive garden but I am here to prove that you CAN homestead in a small space. We have plenty of space to do a lot of things to help us become more self-sustaining and project by project I will show you how too! You do not need a huge piece of land to create your little dream homestead!
I am a ways away from actually getting to move in as there a so many projects needed to be done to finally live here BUT I will be sharing this journey with you every step of the way. I hope you will follow along with me in this adventure!
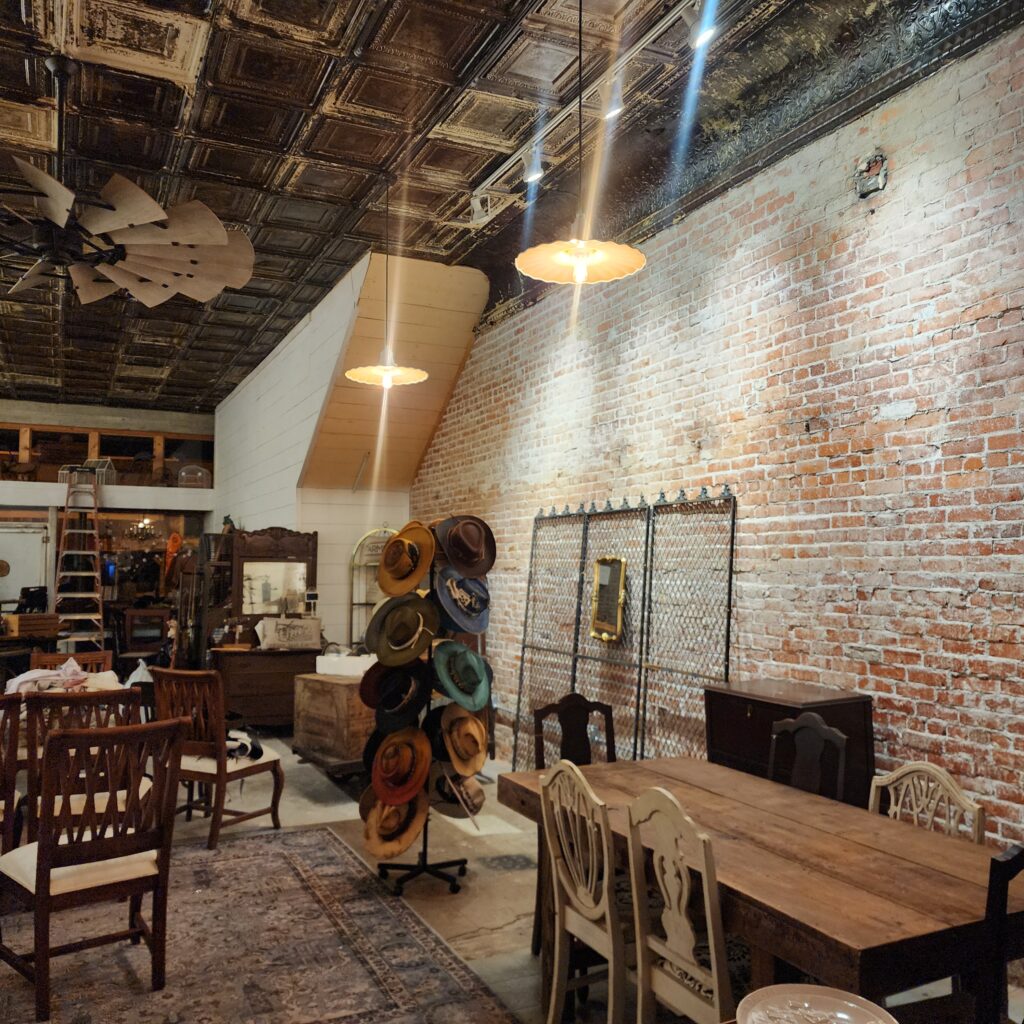
Living Simply
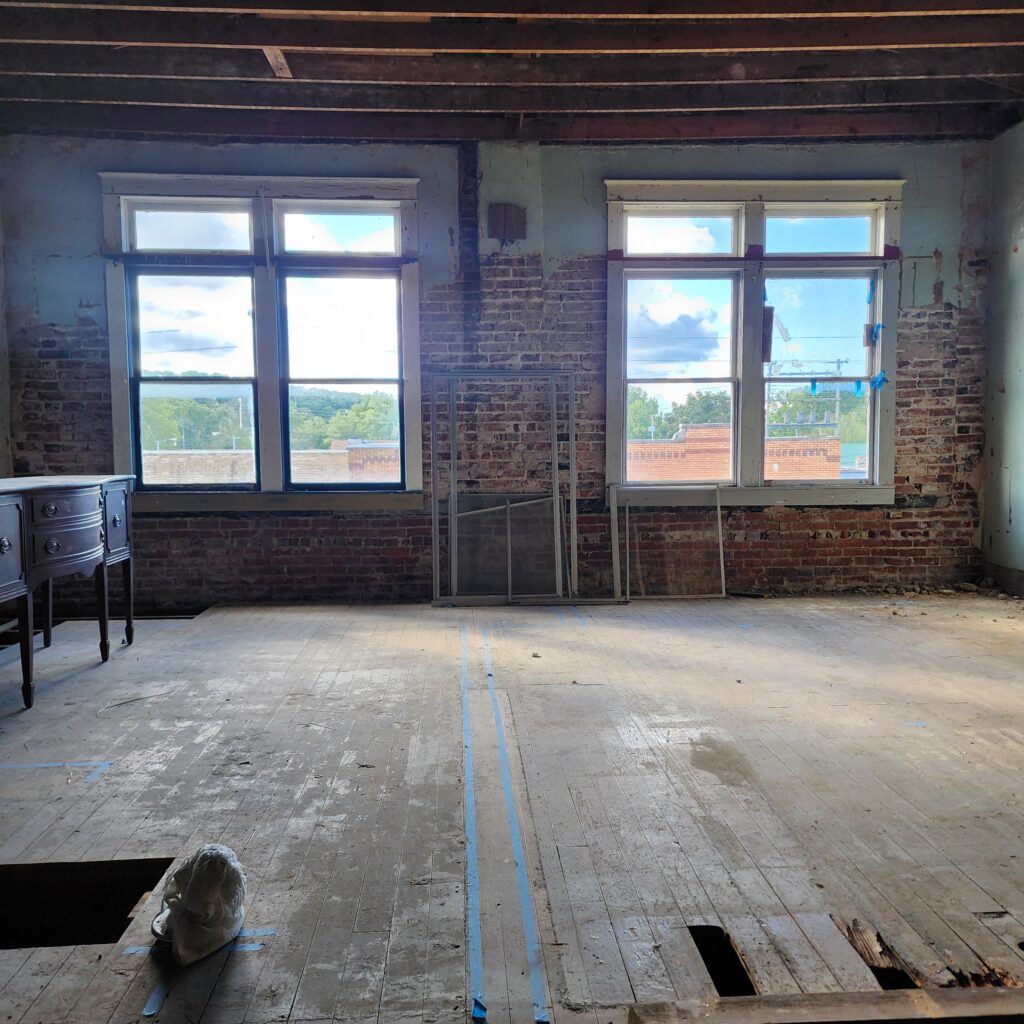
The bricks are a statement piece in our building for sure along with the ceiling. Every time people come in the boutique, they comment on how beautiful they are. This makes me so happy! I love sharing it with our community. The bricks are not actually located in our living space as we will be living upstairs. It is about 2000 square feet upstairs and downstairs so we will have plenty to work with. It will be nice to just walk downstairs and go to work! That is my dream…working from home, taking care of my family, being a good steward of the blessings God has given me, and living a full simple life. I used to think I wanted the mansion, the fancy car, the designer handbags….now I just want fresh milk, a nice garden, a healthy family, and my home. That is my ultimate dream.
Do You Have to Seal The Antique Brick After Removing Plaster?
Yes!! There are two main reasons for sealing the brick after you remove the plaster.
Dust
The top reason is due to brick dust. I have been to places where they chose not to seal the bricks after exposing them and they struggled to keep their floors and surfaces clean. Dust accumulated everywhere! With having a boutique, I did not want to struggle having to keep it dust free all of the time so I knew I had to do this step!
Protection
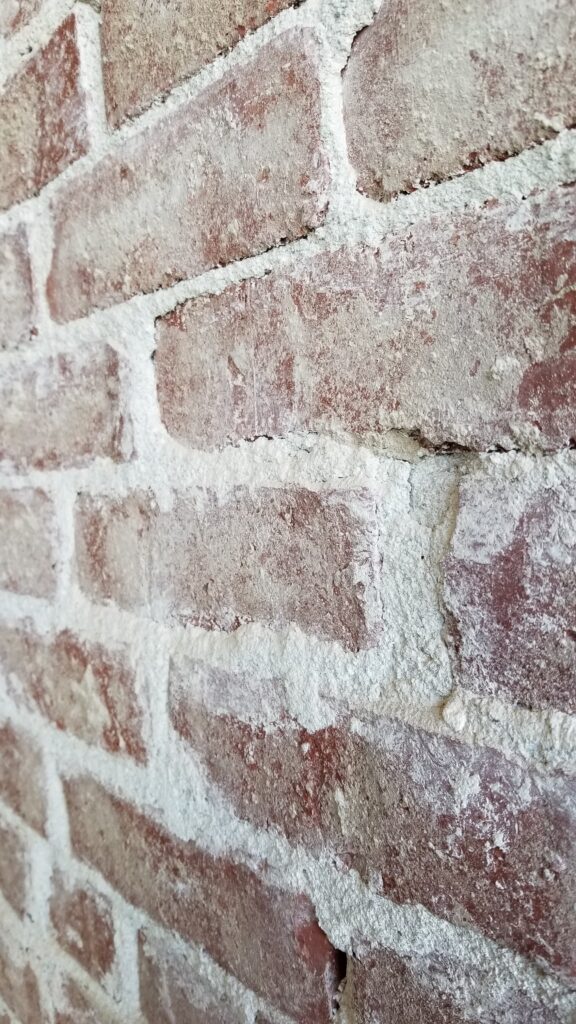
Another reason to seal the antique brick walls is because they are very porous. They can easily absorb moisture and dirt in the air which can lead to cracking and damage down the line. Due to the fact that they were already over a century old, I wanted to do my part in protecting them and preserving such a special piece of history.
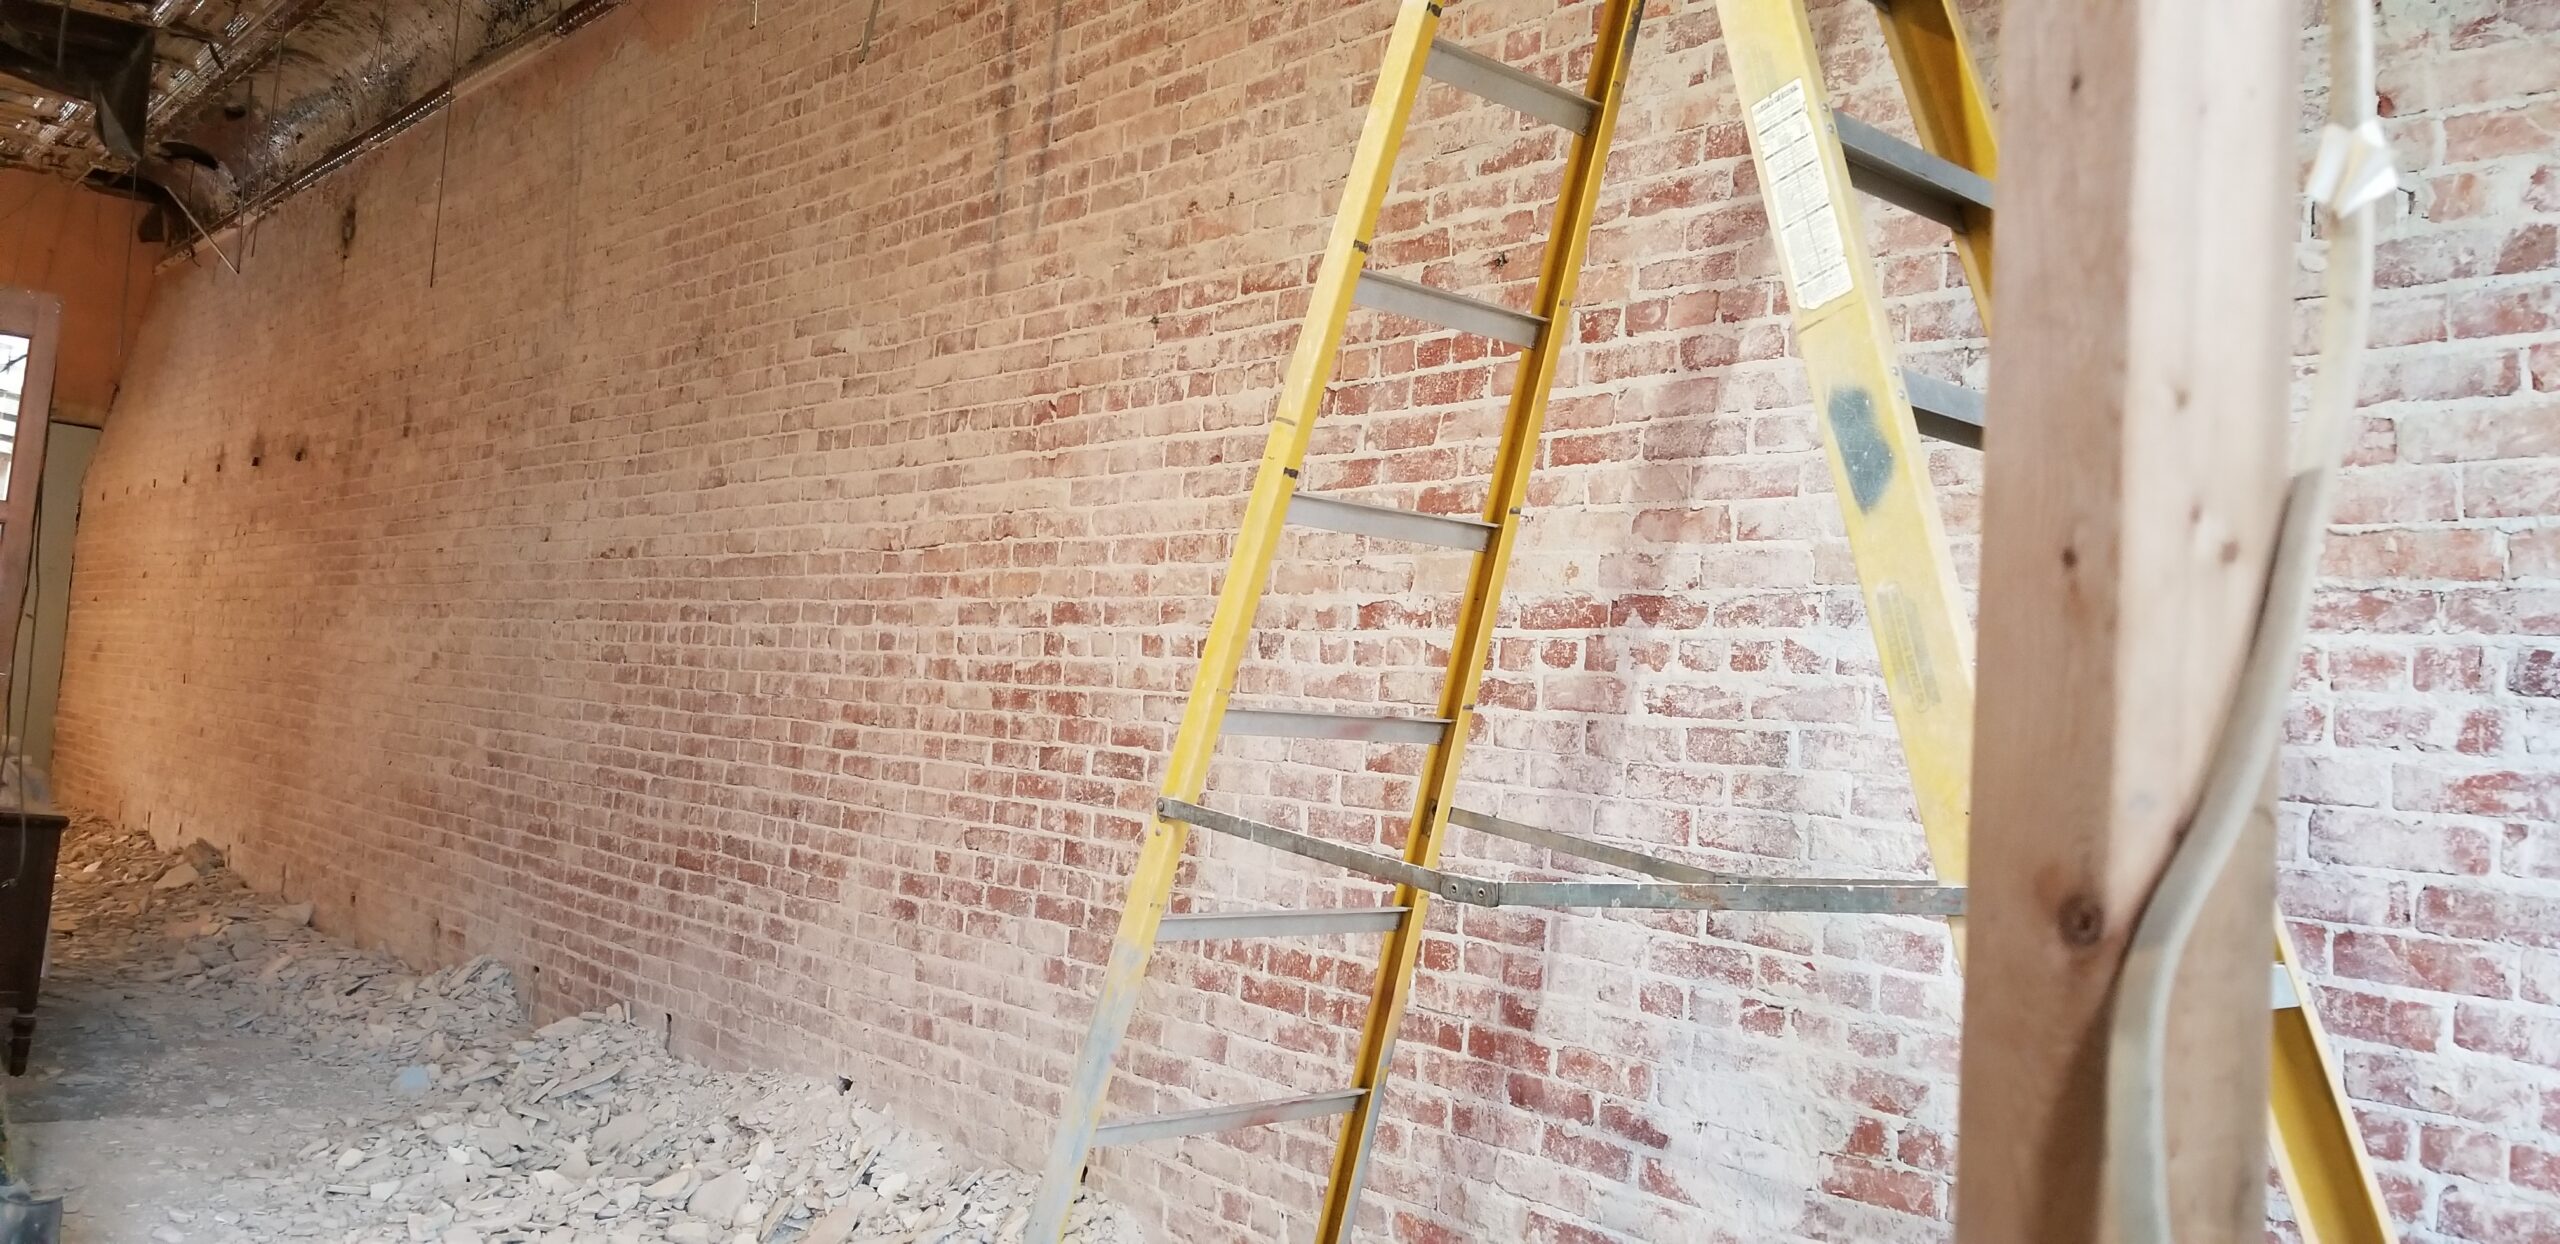
Cleaning the Exposed Antique Brick Walls
An important step that must be done before you can seal exposed brick is cleaning them. You need to remove the leftover dust and dirt that still linger on the wall. This will help the sealant adhere better to the surface. It will also create a cleaner look. Trust me, do not skimp on this important step if you decide to take on a project like this. It is time consuming but well worth the effort. You only have to do it once!
What You Need To Clean Exposed Brick Walls
Here is a list of things you will need to clean exposed brick walls to prepare them for sealing:
- Bristle Brush
- Water
- Vacuum (I used a Stanley shop vacuum)
- Sponge
- Bucket
- Mild soap or detergent
How To Clean Exposed Brick Walls
- Dust and sweep: Remove loose dirt and dust from the brick surface using a vacuum cleaner.
- Wet the brick: Before cleaning, dampen the brick wall with water to prevent the cleaning solution from being absorbed too quickly.
- Cleaning solution: Mix a mild detergent with water in a bucket.
- Scrub with a soft brush: Use a soft-bristled brush (nylon or natural bristles) to scrub the brick surface.
- Rinse thoroughly: Rinse the brick wall with clean water to remove any soap residue.
- Dry completely: Allow the brick to fully air dry before applying sealant.
Tips for Success
- Do not use harsh chemicals to clean the brick surface. Opt instead for a mixture of vinegar and water in a spray bottle.
- DO NOT POWER WASH. When you are dealing with a century old brick wall, even when it is in great shape, you do not want to use a power washer. This can be very damaging to the delicate brick so a more gentle approach is recommended. I also do not recommend using a wire brush to clean as this is very abrasive and can scratch and damage the surface of the brick.
Choosing A Sealant
After we cleaned the brick and allowed to dry for a few days, it was time to seal them. There are many sealants to choose from but we wanted to do something that did not include harsh chemicals. Not having to use a respirator or deal with intense vapors was very important to us.
I also loved the way the raw brick looked. I did not want anything to deepen the color or create a sheen like some exposed brick walls I have seen.
An Unusual Solution
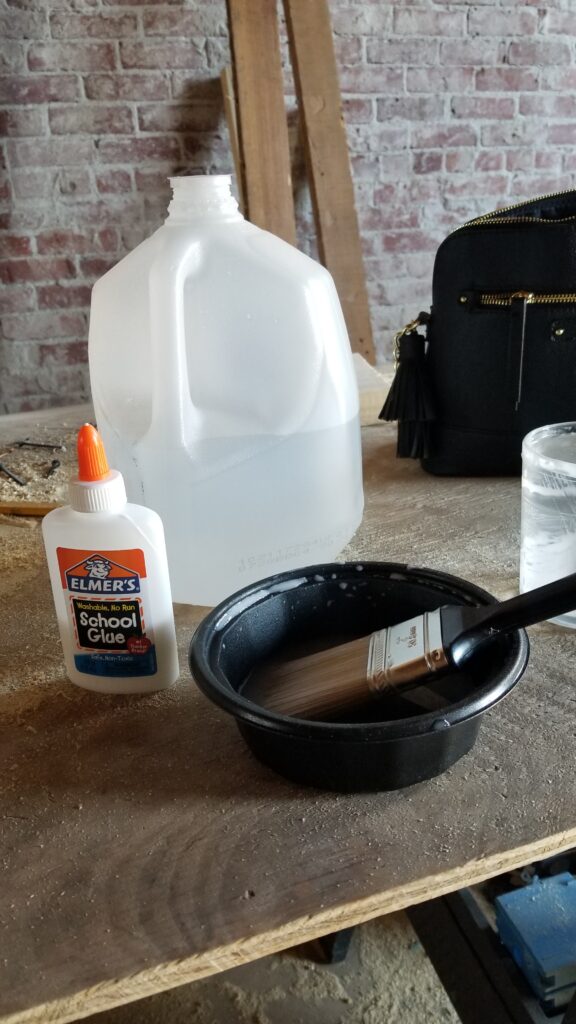
I went back and forth for days trying to decide what to use. My cousin, who is a BRILLIANT man by the way, came up with the answer for me…you honestly will never guess…ELMER’S GLUE!!! I couldn’t find a lot of information on this but it ended up being the absolute perfect sealant for our walls!
It has an odor of course but it is not overly potent, especially since we mix it with water to dilute it. It dries clear and matte so it perfectly preserves the “raw brick” look that we were desiring. Best of all, it is non-toxic and really inexpensive. We could buy large jugs of it at Walmart at the time for less than $10 per gallon. We needed several gallons because we have 14 foot ceilings and the walls are 84 feet long. That is a lot of surface area to cover!
Sealing the Brick Walls
Mixing the Solution
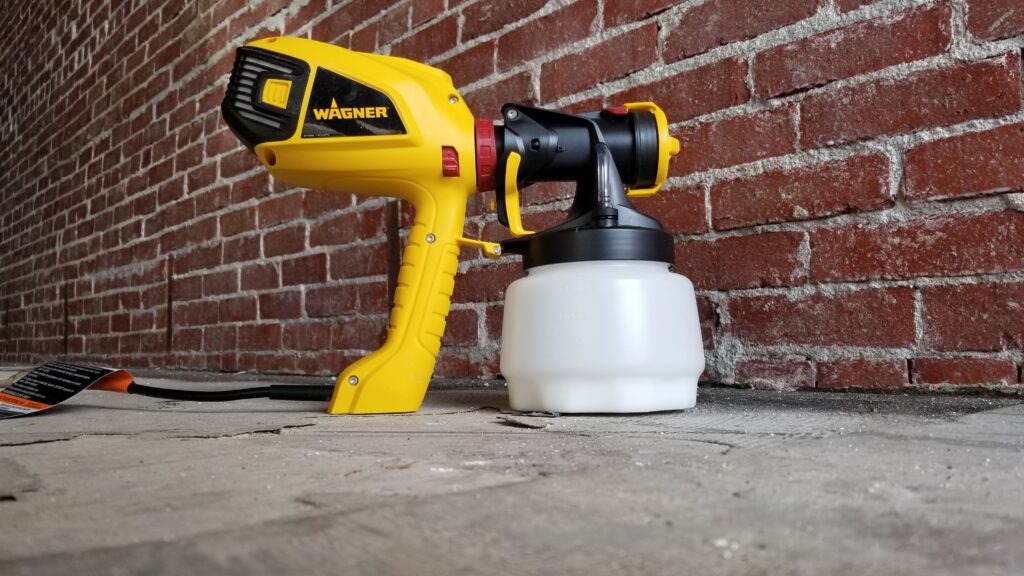
First, you will want to properly mix the Elmer’s glue and water. The ratio we used was one part Elmer’s glue to 4 parts water. Mix well to combine. As you can imagine, one gallon of glue goes a long way. This is great when you are on a tight budget like we are! This ratio of glue and water will help the bricks to still breathe but will keep them from shedding their dust everywhere. It also is thin enough to use in my paint spray gun. We pre-mixed the solution in a bucket and then poured it into the tank of my paint sprayer.
Applying the Sealant
Starting in the back of the building, I began starting at the top of the walls and working my way down standing on a ladder a few feet away from the wall. If using a paint sprayer, make sure you are getting nice even sweeps to evenly coat the surface. You can roll this solution on with a paint roller if you do not have a paint gun but I recommend borrowing one or buying one if you can (depending on how much brick you are working with) because this made the whole process SO much faster!
Once I applied the solution to all of the walls. I allowed them to fully dry for several days before starting anymore projects. I did not want to stir up any dirt or dust that could possible stick to my clean exposed brick wall!
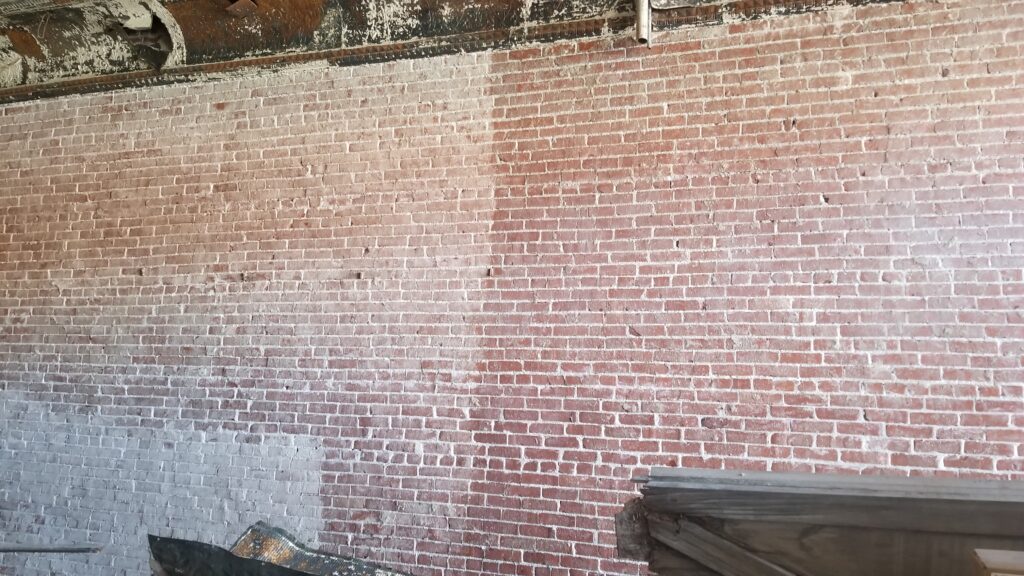
Beauty Is Pain
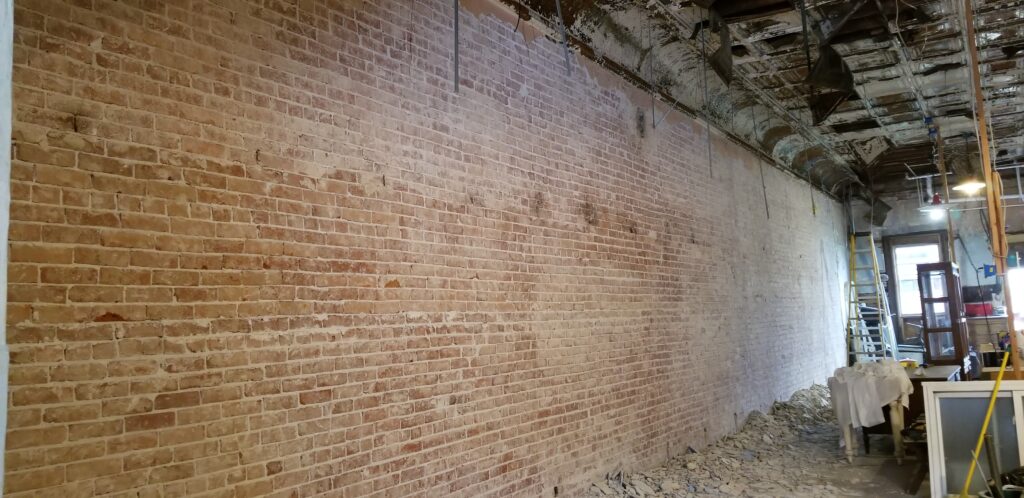
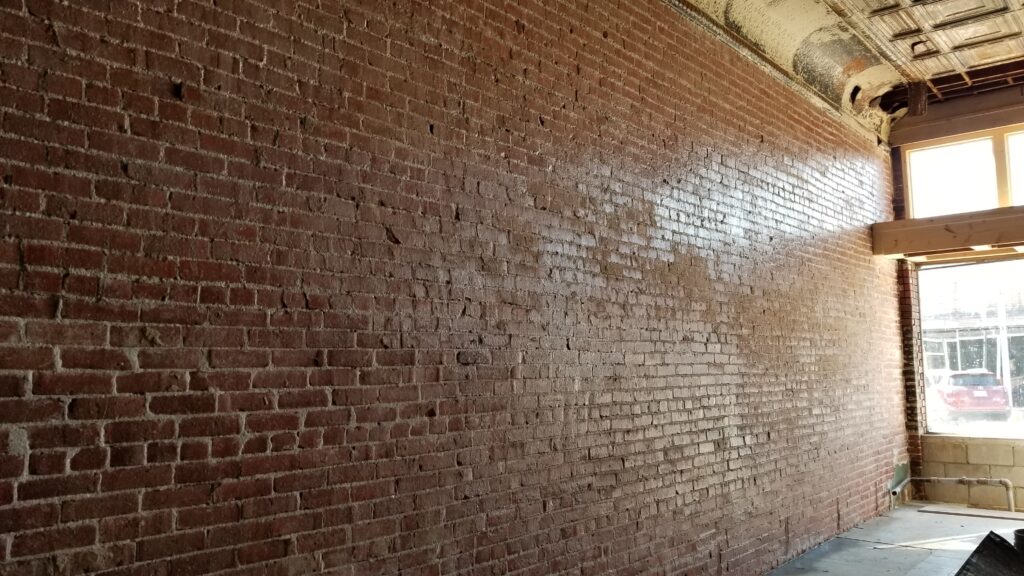
This project for exposing our antique brick walls took several weeks of incredibly intense physical labor. Between all of the chiseling, shoveling every last ounce of plaster chunks into five gallon buckets, transporting those buckets to the dumpster, cleaning the floors afterward, thoroughly cleaning the bricks, and applying the sealant, we were DONE [Insert Angels singing] and the walls looked absolutely gorgeous!! It is hard to believe that they ever looked like this…
This project was done back in 2018 and the glue sealant has held up beautifully. It is amazing that you can just rub your hands over what looks like dusty brick only to see that your hands remain clean. I do not regret this DIY one single bit. A lot of memories were made with my family and friends. If we would have hired this out, it would have cost us thousands. I would say all-in-all we were out less than $100 after the glue, chisels, and other supplies. That is a giant win in my book!
We are now basically done with exposing brick minus two beautiful exposed chimneys that we will have in our home upstairs but that is for another day and another post. I hope you enjoyed following along with this project. Many more to come as we continue to turn this 118 year old historic building into our dream home!
I know this is asking a lot, but if you filmed this, it would be a GREAT YouTube channel – watching the progress of what y’all are doing. I think it’d be able to be repackaged into different places like Pinterest, Facebook and anything other socials that could link to the post (like use a Youtube clip on Pinterest that would send people here to learn more about it). I’ve used Opus Clips AI for splicing longform content into shorts that can be repurposed on socials and Pinterest – just food for thought! I know I’d definitely love to watch!
Thank you for following along friend! This project was done years ago however I do have several film clips of all the projects we have done thus far! YouTube is on the list!! I have a YouTube channel already set up if you’d like to subscribe so you’ll know when I start releasing content! It is youtube.com/ourmanoronmain
It means so much to have others appreciate this place like I do! This has been a passion project for my late mom and I for so long and I promised her I would finish it! Now I am also sharing it with the world ❤️