How We Built A New Chicken Coop From Salvaged Materials

Building a temporary chicken coop during our homestead move was not something we planned far in advance. It was something we had to figure out quickly, with limited time, a tight budget, and a lot of salvaged materials.
Spring was a turning point for us at Our Manor. It was time to move my backyard chickens into a new temporary space while we continued working on our renovation project.
Instead of buying a pre-made coop, we decided to build a DIY chicken coop from salvaged materials using what we already had on hand to keep costs low and make it work for our flock during a very transitional season of life.
Reader Summary
- Follow along as we share how we built a functional chicken coop using mostly scrap and reclaimed materials to keep costs low.
- See the materials we used, the challenges we faced, and the creative solutions that helped bring the project together.
- Learn practical tips for repurposing materials and making the most of what you already have on hand.
- Get inspiration for creating a budget-friendly chicken coop that fits your own homestead, backyard flock, or DIY goals.
*Some of the links in this post may be affiliate links, which means I may earn a small commission if you make a purchase at no extra cost to you. I only share products I personally use or genuinely believe in. Thank you for supporting Our Manor On Main and this little homestead journey!
If you have backyard chickens of your own, you may also find these posts helpful:
- How to Raise Baby Chicks
- Chickens Molting in Late Summer: What’s Happening With My Feathered Girls
- Why Your Chickens Stopped Laying Eggs — 7 Things to Check This Summer
Meet My Backyard Chickens (My Sweet Girls)
My love for chickens started long before we ever had a homestead.
I first remember them in 3rd grade during an incubator project at school. Most of those chicks ended up being roosters, but I still remember how fascinated I was watching them hatch and grow.
Years later, during COVID in May of 2020, I ordered my first real flock of 15 baby chicks. I still remember picking up that little ventilated box at the post office and hearing them chirping before I even opened it. That was the beginning of my hands-on journey with backyard chickens.
You can read more about my journey with that here.


At the time, I was living back home in the Midwest after moving from Dallas. I stayed at my mom’s house, which is also my childhood home, while we worked on restoring our building, the Manor. It made sense to stay there during renovations instead of paying rent elsewhere.
I raised my first flock at my mom’s house, and during that season we built our very first chicken coop in her backyard. That experience is really where I learned how much I loved caring for chickens and building spaces for them.

We named the girls after Downton Abbey characters, and over time they became a big part of everyday life.
A few years later, after my mom became ill and passed away, we began preparing her estate for sale. That meant it was time to relocate the chickens and build a new setup at the Manor, where our long-term homestead project was already underway.
This post is about that second coop, the one we built at the Manor to bring the girls back home with us.

Why We Built a Temporary Chicken Coop
We knew from the beginning this coop would not be forever. It was what we needed for this season.
Our long-term plan is a more permanent structure as part of the renovation. This build was really about:
- keeping the girls safe
- working within a tight budget
- using what we already had whenever possible
It became a true budget-friendly chicken coop build using salvaged materials.
Salvaged Materials We Used
This is where we were able to get really resourceful.
We reused:
- hardware cloth from our previous coop
- screws, washers, and small hardware
- an old calf hutch (this has worked out SO well!)
- reclaimed barn tin
- leftover 2×4 lumber from upstairs renovations
We only had to buy a few things:
- plywood
- a vinyl floor remnant (I highly recommend covering your coop floor with this!)
- a few screws and drill bits
- a new circular saw blade
It felt good to build something useful out of what we already had instead of starting from scratch.

Building the Coop on a Time Crunch
This was not a polished weekend project. It was a work-when-we-could kind of build in whatever weather we got.
We worked on it over several days in sun, rain, wind, and even late into the night. With a deadline coming up fast, we finished it just in time for the move.
It was not perfect, but it was safe and it was theirs.


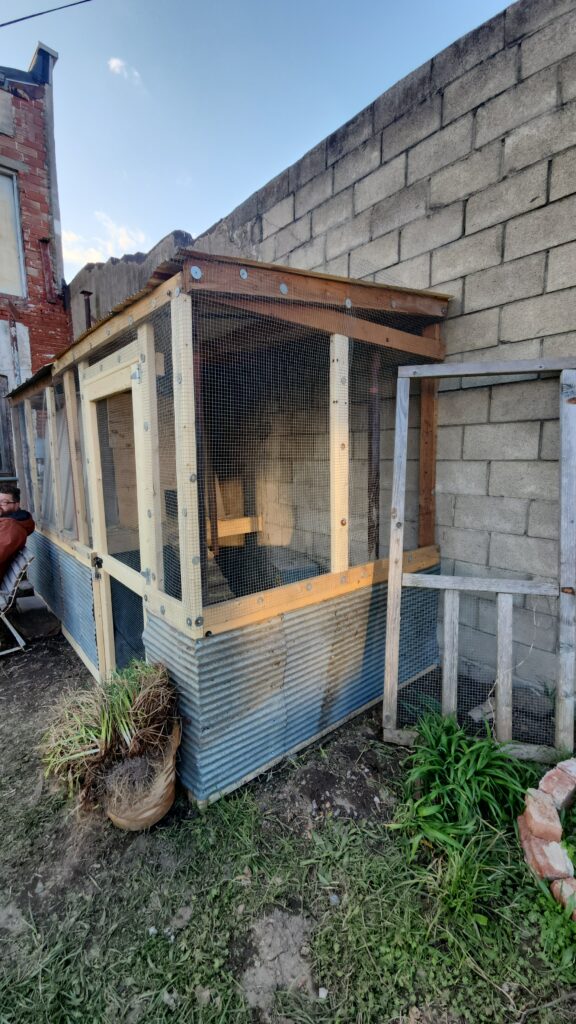
The Final Coop Setup
This was always meant to be a temporary chicken coop for backyard chickens, with plans for a more permanent build later under the deck stairs.
For now, it includes:
- a secure enclosed space
- a simple nesting area
- a recycled ramp from our old coop
- basic weather protection and ventilation
Simple, but it worked exactly how we needed it to.
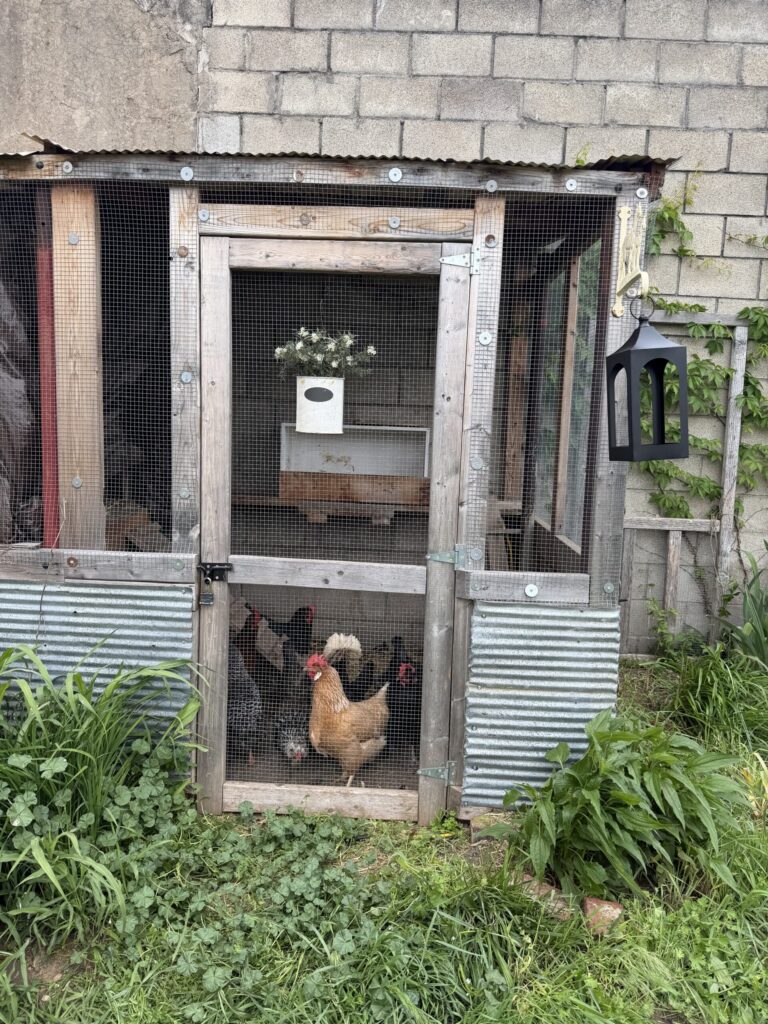
How the Girls Adjusted
Once we moved them in, they settled surprisingly fast.
Now their days are filled with scratching through the dirt, waiting for treats, and exploring their space at the Manor while we work nearby.
It has been really nice having them closer during the renovation.

A Little Life Happening Around the Coop
One of my favorite parts of this project is just how alive everything feels around it now.
This space has become part of our everyday rhythm at the Manor, and even though it was built quickly and with salvaged materials, it has become something really meaningful in our homestead story.
Frequently Asked Questions About Building a Chicken Coop from Salvaged Materials
Can you build a chicken coop from salvaged materials?
Yes, you absolutely can. We built our temporary chicken coop almost entirely from reclaimed materials like barn tin, leftover lumber, and hardware from a previous coop. It was a great way to save money and still build something safe and functional for our backyard chickens.
How much does it cost to build a DIY chicken coop?
The cost can vary widely, but using salvaged materials significantly reduces expenses. In our case, we only purchased a few additional items like plywood, screws, and basic tools, which kept the project very budget-friendly.
Is a temporary chicken coop safe for backyard chickens?
Yes, as long as it is secure, dry, and protected from predators. Our temporary setup was designed to be simple but safe while we worked on our long-term homestead plans.
How long does it take to build a chicken coop?
It depends on the design and materials, but ours took several days of working on and off between weather and life schedules. Salvaged-material builds often take longer in planning but less in cost.
What is the best location for a chicken coop?
A good location is one that is dry, has some shade, and is close enough for daily care. We placed ours near our working area at the Manor so we could easily check on the girls throughout the day.
Lessons We Learned Building a Salvaged Chicken Coop
Looking back, this project taught us a lot about working with what you have instead of waiting for perfect conditions.
Some of the biggest lessons were:
- You do not need new materials to build something safe and functional
- Temporary setups can still feel like home for your animals
- Time pressure forces creativity in the best way (You have to focus on the positive right? 😅)
- Perfection matters far less than getting it done when your animals need it
Even though this coop was built quickly and under pressure, it ended up being one of the most meaningful projects in our homestead journey!
Final Thoughts
This coop is not perfect, and it was never meant to be.
But there is something to be said about building a homemade chicken coop from salvaged materials during a messy, real season of life and then watching your flock settle into it like it has always been theirs.
It may be temporary, but it is ours.
There is so much joy in the backyard now and I am very happy with how it turned out! I hope this post inspired you to build your own backyard coop using salvaged materials.
Happy Homesteading, friend!
XO, Bri
You Might Also Enjoy These Homestead Reads
If you enjoyed this glimpse into our backyard chicken journey, you might also like a few of these related homestead posts:


More Homestead Life at Our Manor
If you enjoy the behind-the-scenes of our homestead journey, you might also like these posts:


Let’s Stay Connected!
Our homestead story doesn’t just live on the blog. I also share everyday moments, chicken updates, recipes, and renovation progress over on social media if you’d like to follow along there too!