Healthy Whole Grain Sandwich Bread

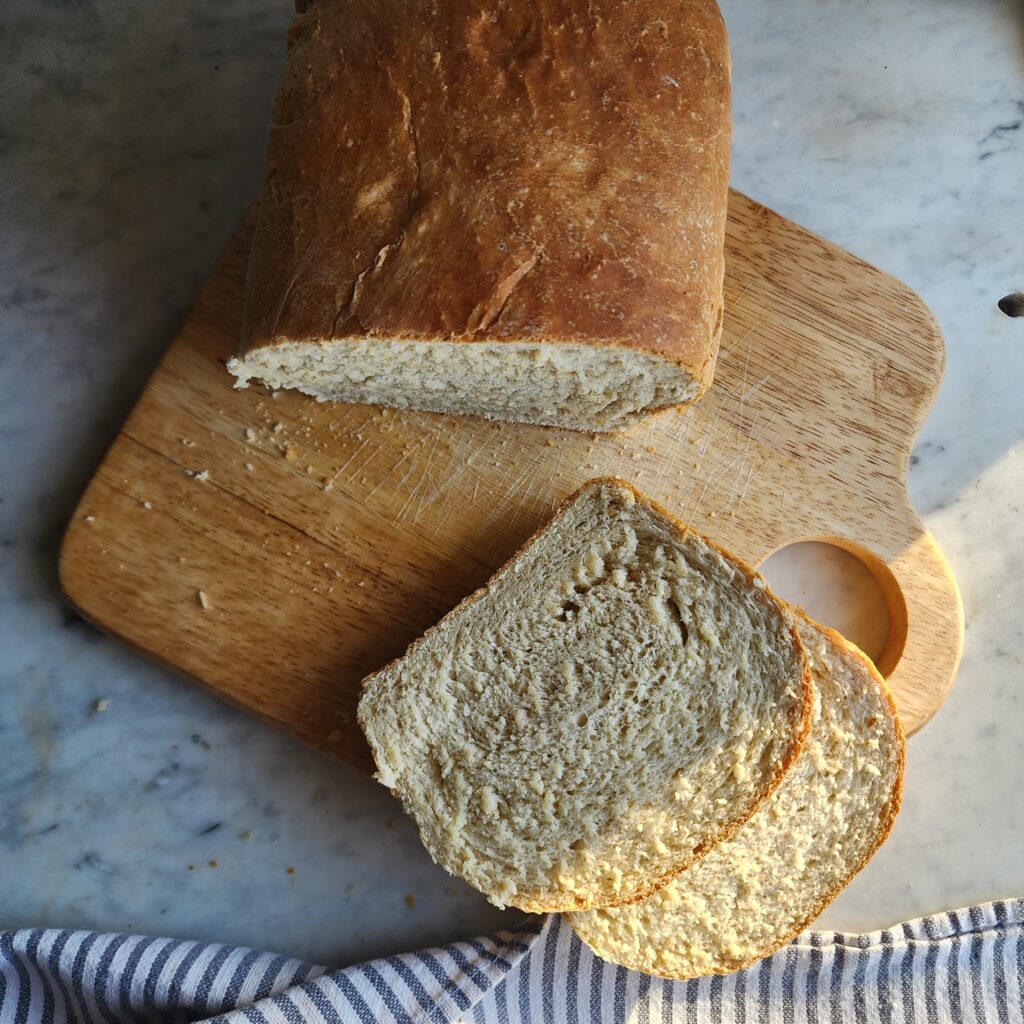
This made-from-scratch healthy whole grain sandwich bread is a nutritious alternative to store-bought loaves. Made with freshly milled whole wheat flour, this soft and flavorful bread is perfect for sandwiches, breakfast toast, or served warm with dinner. Whether you’re looking for a wholesome lunch option or a hearty homemade bread recipe, this loaf delivers both taste and nutrition in every slice.

Recipe Summary
- Step-by-step method to roast a juicy pork tenderloin with a glossy maple apple glaze, including the exact internal temperature and timing to guarantee perfect doneness and caramelized apples.
- Clear use cases and serving ideas for weeknight family dinners, cozy date nights, or holiday menus, plus easy side dish and wine pairing recommendations.
- Practical tips to avoid common mistakes like overcooking, under-seasoning, or a watery glaze, along with quick fixes if things start to go wrong.
- Straightforward answers to FAQs about ingredient swaps, make-ahead and storage instructions, reheating without drying the meat, and simple variations to scale the recipe.
*This post may contain affiliate links, which means I may earn a small commission if you purchase through them at no extra cost to you. I only share tools and products I actually use or trust.
If you are in the mood to make other pantry staples like this whole grain sandwich bread, you will also like these other posts on the blog: Easy Sourdough Discard Tortilla Recipe, Made From Scratch Sourdough Bread, or if you have leftover bread, this recipe for Homemade Croutons is a great pairing for salads and soups!
Sandwiches, One of my Favorite Past Times
Picture a warm and sunny Summer day. You are in junior high and are spending the day with your very best friend. You go for a nice long swim in the pool with not a care in the world. No bills, no school, no stress, just a relaxing fun time. Afterwards, you grab a dry towel and wrap it around yourself, make a sandwich-stacking on your favorite chips- and go sit on the deck at the glass table. You sip on a cold can of soda and play cards. The birds are chirping, the gentle breeze blows through, and everything in that moment is perfection.
Those were the Summers of my childhood. I look back on those days very fondly. Every now and then I will still pile on my favorite chips in my sandwich and it brings me back to those special days. That was many many years ago and life indeed looks very different. One thing that has not changed however is the fact that I love sandwiches.
What were some of your favorite Summer memories as a kid? I would love to know!
Sandwich Ideas for Your Whole Grain Bread
One of the best things about homemade whole grain sandwich bread is how versatile it is for everyday meals. It holds up beautifully for both cold and hot sandwiches, making it perfect year-round.
For easy cold lunch ideas, try layering your bread with classics like turkey and cheese, ham and Swiss, or chicken salad with crisp lettuce and tomato. The nutty flavor of whole grains pairs especially well with savory deli-style fillings.
When the weather cools down, this bread also shines in warm sandwiches. Think gooey grilled cheese, toasted ham and Havarti, or a simple panini with melted mozzarella and pesto!
Some of our favorite combinations include:
- Turkey, avocado, and Dijon mustard
- Ham, cheddar, and honey butter (pressed)
- Egg salad with cracked black pepper
- Classic BLT with thick-cut bacon
- Grilled cheese with sharp cheddar and garlic butter
No matter how you slice it, the foundation of any great sandwich is the bread itself. That’s why this whole grain sandwich bread is such a staple. It’s sturdy enough for hearty fillings, but soft enough for everyday sandwiches, straight from the oven or toasted.

Ingredients for Whole Grain Sandwich Bread
This whole grain sandwich bread is made with simple pantry ingredients, but each one plays an important role in creating a soft, sliceable loaf that works beautifully for everyday sandwiches, toast, and paninis.
Whole Wheat Flour
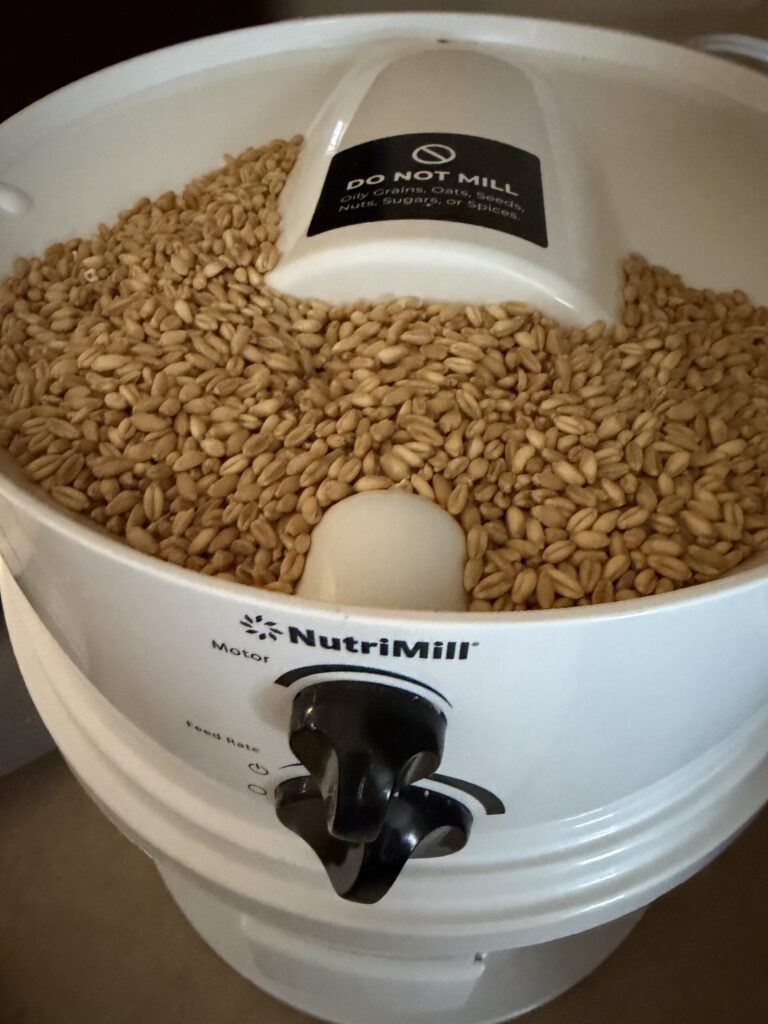
I milled mine fresh using hard red wheat berries, which gives the bread a deeper, more rustic flavor and a slightly heartier texture. Fresh-milled flour can also absorb more liquid than store-bought flour, so the dough may feel slightly different depending on how finely it is ground.
If you’re not milling your own flour, regular whole wheat flour works perfectly.
- Best substitute: White whole wheat flour for a lighter flavor and softer crumb
- Tip: If using fresh-milled flour, you may need a small splash more water to adjust hydration
- Optional blend: Up to 25–50% bread flour can be added for a taller, lighter loaf
Water
Water hydrates the flour and activates the yeast, forming the structure of the dough.
- Best practice: Use warm water (not hot) to help the yeast activate properly
- Substitution: Milk can be used for a softer, richer loaf
- Dairy-free options: Almond, oat, or soy milk all work well with minimal change in texture
Olive Oil
Olive oil helps create a soft crumb and keeps the bread fresh longer.
- Adds tenderness and improves shelf life
- Light olive oil gives a mild flavor, while extra virgin olive oil adds a more noticeable taste
- Substitution: Melted butter or avocado oil both work well depending on flavor preference
Honey
Honey adds a subtle sweetness and helps feed the yeast, supporting a better rise and browning in the oven.
- Balances the earthy flavor of whole wheat flour
- Helps create a softer texture and golden crust
- Substitution: Maple syrup or granulated sugar can be used in equal amounts
- You can reduce slightly if you prefer a more savory bread, but avoid skipping entirely
Eggs
Fresh eggs (especially from backyard hens) add richness, structure, and a softer crumb to the finished loaf.
- Help improve dough elasticity and sliceability
- Contribute to a tender, slightly richer texture
- Substitution: 1 flax egg (1 tbsp ground flax + 3 tbsp water) per egg can be used
- Without eggs, the loaf will still work but will be slightly denser
Instant Yeast
Instant yeast helps the dough rise quickly and evenly without needing a separate proofing step.
- Can be mixed directly into dry ingredients
- More forgiving for beginner bread bakers
- Substitution: Active dry yeast works as well but should be proofed in warm water first
Salt
Salt enhances flavor and strengthens the dough structure.
- Balances the sweetness from honey
- Helps regulate yeast activity for an even rise
- Tip: Don’t reduce too much or the bread will taste flat
- Substitution: Sea salt or kosher salt both work (adjust for grain size)
Why I Use Freshly Milled Flour (and Why It Changes This Bread)
One of the biggest upgrades in my bread baking has been switching to freshly milled flour. I don’t use it for every single thing I bake, but for this whole grain sandwich bread, it really makes a difference in both flavor and texture.
When you mill wheat berries right before baking, you’re working with flour that hasn’t been stripped of its freshness or sitting on a shelf for months. The flavor is deeper, a little nuttier, and honestly just more “alive” tasting. The bread feels more nourishing too, like it actually came from real grain instead of something pre-processed.
For this recipe, I used hard red wheat berries and milled them fresh into flour. It gives the loaf a more rustic flavor and a stronger structure, which works really well for sandwich bread that needs to hold up to fillings without falling apart.
That said, I know not everyone has a grain mill sitting on their counter, and you absolutely don’t need one to make this recipe work. Regular whole wheat flour will still give you a great loaf. Freshly milled just takes it a step further if you’re ready for it.
If you are curious about milling your own flour at home, I use my NutriMill Classic Grain Mill. It makes the process really simple, just pour in the wheat berries and let it do the work. It turns what used to feel like a “specialty baking thing” into something you can actually do on a regular weeknight if you want to.
Once you start baking with fresh flour, it’s one of those things that’s hard to unnotice. Even simple recipes start tasting a little more homemade in the best way!
Instructions for Whole Grain Sandwich Bread
This whole grain sandwich bread is made using a stand mixer for ease and consistency. The process includes mixing, resting, kneading, two rises, shaping, and baking into soft, sliceable sandwich loaves.
Step 1: Mill and Measure the Flour (If Using Whole Grains)
If you are using whole grains, start by milling your flour using a grain mill. Freshly milled flour creates a more flavorful and nutrient-dense loaf, but it also absorbs liquid differently than store-bought flour.
For best results, weigh your flour using a kitchen scale instead of measuring by cups. Weight-based measuring improves dough hydration accuracy, which leads to lighter, fluffier sandwich bread and more consistent baking results.

Step 2: Combine Wet Ingredients and Build the Dough
In the bowl of a stand mixer, add the water first. Then add all remaining ingredients except the yeast and salt.
Mix on speed 2 (KitchenAid or similar stand mixer) until a shaggy dough forms and the ingredients are mostly combined into a cohesive mass.
At this stage, the dough does not need to be smooth—just fully hydrated and brought together.

Step 3: Rest the Dough (Autolyse Rest)
Let the dough rest for 15–20 minutes.
Cover the bowl with a damp towel or plastic wrap to prevent drying.
This rest period allows the flour to fully hydrate and begin gluten development naturally, improving dough elasticity and making the final loaf softer and easier to shape.
Step 4: Add Yeast and Salt, Then Knead
After the rest period, add the instant yeast and salt to the dough.
Continue kneading on speed 2 for about 8–10 minutes, or until the dough becomes smooth, elastic, and slightly tacky but not sticky.
Proper kneading helps develop gluten structure, which is essential for achieving a soft but sturdy sandwich bread that slices cleanly.
Step 5: First Rise (Bulk Fermentation)
Transfer the dough to a lightly oiled mixing bowl and cover.
Let it rise in a warm spot until doubled in size, typically 45 minutes to 1.5 hours depending on kitchen temperature and yeast activity.
The dough is ready when it has visibly expanded and feels airy when gently pressed.

Step 6: Divide and Shape the Dough
Once the dough has doubled, punch it down gently to release excess gas.
Divide the dough evenly into two portions—this recipe yields two sandwich loaves.
Shape each piece into a tight log by pulling the dough taut and creating surface tension. This step is important for oven spring and helps the loaf rise evenly in the pan.
Place each shaped loaf into a greased bread pan.

Step 7: Second Rise (Final Proof)
Cover the pans and let the dough rise again until it has doubled and is slightly domed, rising about 1 inch above the rim of the pan.
Proper proofing ensures a light, airy crumb. If the dough is under-proofed, the loaf may be dense; if over-proofed, it may collapse during baking.
Step 8: Bake the Bread
Preheat the oven to 350°F (175°C).
Bake the loaves for 35–40 minutes, or until the tops are golden brown and the loaves sound hollow when tapped.
For best results, remove the bread from the pans immediately after baking to prevent steaming and a soggy crust.
Transfer to a wire rack and allow the loaves to cool completely.
Step 9: Cool Before Slicing
Let the bread cool for at least 1.5 to 2 hours before slicing.
This step is essential—cutting too early can cause the crumb to become gummy because the structure is still setting as it cools.
As tempting as it is, fully cooling ensures clean slices and the best texture for sandwiches and toast.


Whole Grain Sandwich Bread
Equipment
- Stand Mixer
- Grain Mill (optional) For freshly milled flour
- 2 9 x 4 inch loaf pans
Ingredients
- 880 g Whole Wheat Flour Hard White or Hard Red Wheat
- 528 g Water- Room Temperature
- 4 1/2 TBSP Olive Oil
- 4 1/2 TBSP Honey
- 2 Eggs
- 5 tsp Instant Yeast
- 3 3/4 tsp Salt
Instructions
- First, if you are using whole grains, mill your flour using your grain mill. If you have a kitchen scale, I highly recommend that you weigh your flour. I have found that it has been a game changer in my bread making journey. The loaves end up being lighter and more fluffy which is always desirable.
- Next, put the water in a stand mixer. Add the rest of the ingredients except for the yeast and salt. We will add those in momentarily.
- Knead the dough on speed 2 (if using a Kitchenaid) until a ball of dough forms and the ingredients are well combined. Let the dough rest for about 15-20 minutes. Cover with a damp towel or plastic wrap to keep the dough from drying out.
- Now, add in the yeast and salt. Continue to knead for about 10 minutes.
- Add the dough to an oiled mixing bowl and cover. Let rise until doubled in size. Depending on the temperature of your kitchen, it could take 45 minutes to about an hour and a half. Once the dough has doubled, punch it down and divide it in half.
- Shape the dough into logs, adding tension to aid in oven spring. Add them into a greased bread pan. Cover and let rise until doubled and standing about an inch above the rim of the pan. The bread should not spill over the rim of the pan if you have built good tension when shaping.
- Preheat the over to 350 degrees and bake the loaves for about 35-40 minutes. Immediately remove the freshly baked bread from the pans and allow to completely cool on a wire rack, usually about 2 hours. Do not cut until the bread is fully cooled for best results.
How to Store Whole Grain Sandwich Bread
Proper storage helps keep your homemade whole grain sandwich bread soft, fresh, and sliceable for days after baking.
Room Temperature Storage
Once the bread has completely cooled, store it at room temperature in an airtight container or bread bag.
- Best for: 2–4 days of freshness
- Store whole or pre-sliced, depending on how you use it
- Keep in a cool, dry place away from direct sunlight
- Avoid refrigerating, as it tends to dry the bread out faster
For best texture, slice as needed rather than slicing the entire loaf at once.
Freezing Instructions
This bread freezes beautifully, making it perfect for meal prep or baking ahead.
- Allow the loaf to cool completely
- Wrap tightly in plastic wrap or beeswax wrap
- Place in a freezer-safe bag or container
- Freeze for up to 3 months
You can freeze the whole loaf or slice it before freezing for easy grab-and-go toast or sandwiches.
To thaw, let it sit at room temperature or toast slices directly from frozen.
Reheating Tips
To bring back that fresh-baked texture:
- Toast slices lightly for sandwiches or breakfast toast
- Warm whole slices in the oven at 300°F for 5–10 minutes
- Avoid microwaving if possible, as it can make the bread rubbery
Frequently Asked Questions
Can I use all-purpose flour instead of whole wheat flour?
Yes, you can substitute all-purpose flour, but the bread will be softer and less hearty. Whole wheat flour gives this recipe its signature nutty flavor and structure.
For a lighter loaf, you can also do a 50/50 blend of whole wheat and bread flour.
Why is my whole grain bread dense?
Dense bread usually comes from one of the following:
- Not enough kneading (gluten not fully developed)
- Under-proofing or over-proofing the dough
- Too much flour added during mixing
- Using freshly milled flour without adjusting hydration
Weighing ingredients and allowing full rise times will greatly improve texture.
Can I make this bread without eggs?
Yes. You can omit the eggs or replace them with flax eggs (1 tbsp ground flax + 3 tbsp water per egg).
Keep in mind that egg-free versions will be slightly less rich and a bit denser, but still soft and sliceable.
How do I know when the dough has risen enough?
The dough should roughly double in size during both rises. A simple test is gently pressing the dough:
- If the indentation slowly springs back, it’s ready
- If it collapses quickly, it may be over-proofed
- If it doesn’t spring back at all, it may need more time
Can I make this bread ahead of time?
Yes, this dough works well for planning ahead.
- You can refrigerate the dough after the first rise for up to 12–18 hours
- Let it come back to room temperature before shaping and baking
- You can also bake and freeze the finished loaves for later use
Final Thoughts
There’s something incredibly satisfying about pulling a homemade loaf of whole grain sandwich bread from the oven, especially when it’s made with simple, real ingredients from your own kitchen.
This bread is soft enough for everyday sandwiches, sturdy enough for hearty fillings, and wholesome enough to feel good about serving your family. Once you start making it from scratch, it’s hard to go back to store-bought. I really hope you enjoy it as much as we do!
Happy Baking, friend.
XO, Bri
More Fresh Homemade Bread Recipes You Will Love
If you’re on a homemade bread baking kick, here are more of my fresh bread recipes made from simple ingredients and perfect for everyday baking.

Let’s Stay Connected!
Follow along for more fresh homemade bread recipes, from scratch cooking, and homestead inspiration!