Chickens and Bumblefoot: How to Treat and Heal This Common Infection

Chickens are the perfect addition to any home when you are building a self-sustaining life. Not only are they sweet, they provide eggs and meat to feed your family for several years. Just like other farm animals, sometimes they get sick and need our help. I have learned through years of chicken ownership that there are not many veterinarians that treat poultry. Because of this, you will be the one caring for them when things go wrong. This post will guide you through the process of treating bumblefoot in chickens.
Just a quick note: this post contains Amazon affiliate links. That simply means if you click and make a purchase, I may earn a small commission—at no extra cost to you. It helps keep the coop running over here, and I’m so grateful for your support!
New to backyard chickens? You may also find these guides helpful: how to raise baby chicks, how to keep chickens cool in the summer, and what to expect during molting season. Now, let’s talk about one of the most common chicken health issues you’ll encounter: bumblefoot.
My Experience With Bumblefoot in Chickens
My chicken ownership endeavors began when I was in second grade. We were doing an experiment in class with the incubator to learn about how chicks form and hatch. The class was so excited when we watched each little bird awaken and break out of it’s little shell. After the experiment was over, the class was invited to take home chicks to raise as their own.
I BEGGED my mom to let me have some and she finally let me pick out 4 of them to take home. Because I loved those little birds so much, I even gave them flying lessons in our home. I created diplomas for each of them when they completed the course! We raised them in our basement in a little plastic tote until they were big enough to let live outside in our barn. Unfortunately they ALL turned out to be roosters and that itself comes with some rather humorous stories.

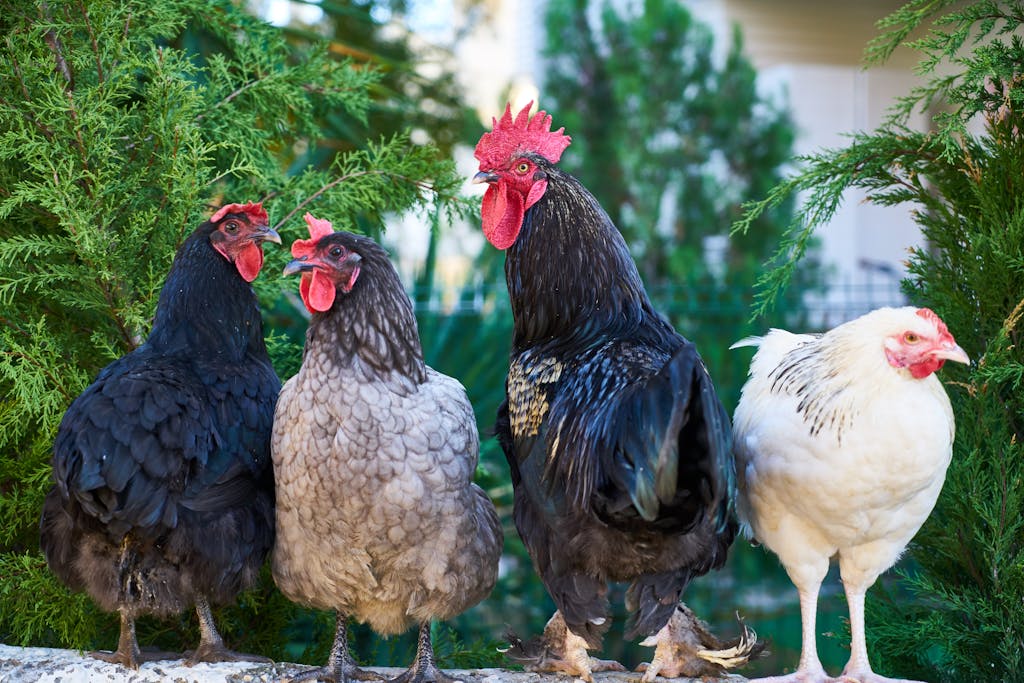
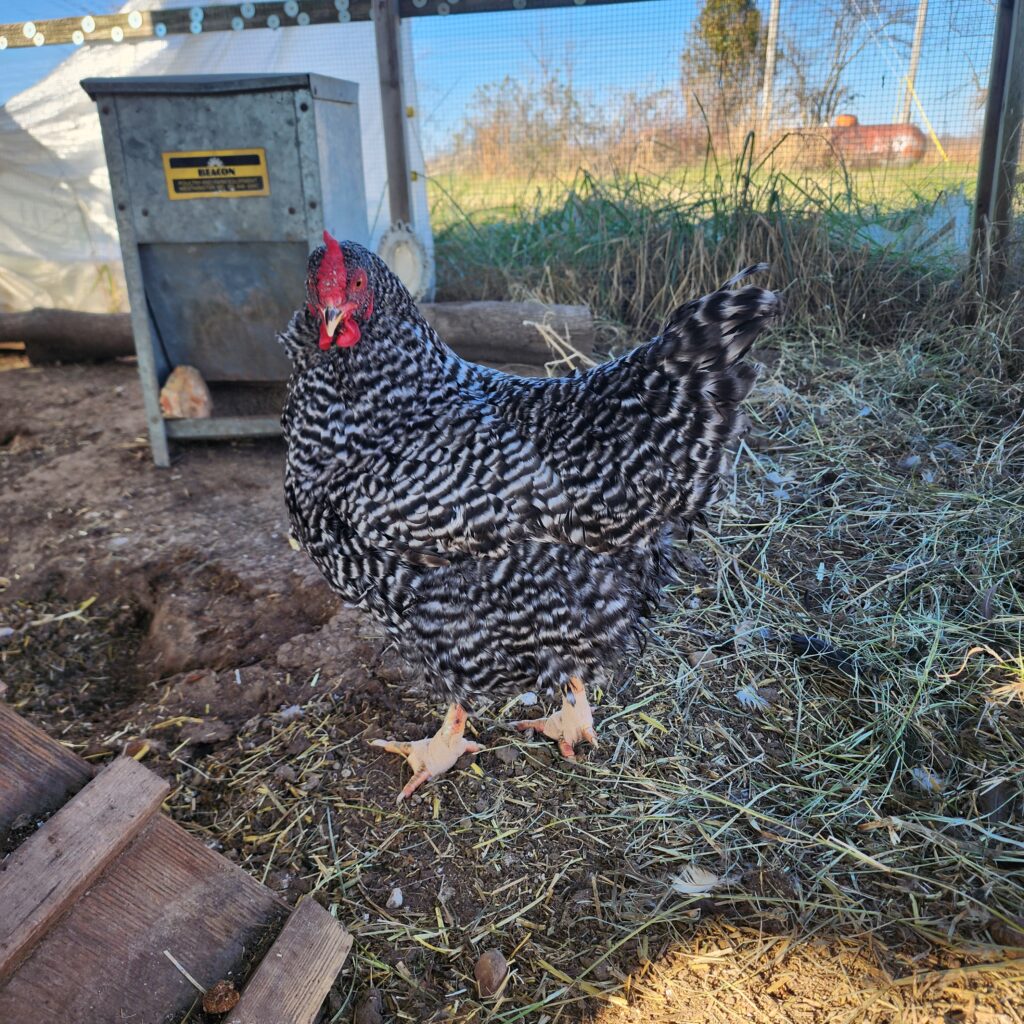
When the pandemic hit in 2020, I too jumped on the chicken bandwagon and brought home 15 beautiful chicks. I named them all from the cast of Downton Abbey and still have 8 of them to this day. During the last 4 years, I have treated bumblefoot twice.
When I first saw it, I had no idea what it was. I had never heard of bumblefoot, let alone had any idea of how to fix it. I browsed Pinterest and Google and studied up on several articles on the topic and jumped into action. If you have never done anything like this before, I know it can feel like a daunting task. You can do this! With proper sanitation and care, your bird will be back up and feeling better in no time.
What is Bumblefoot in Chickens?
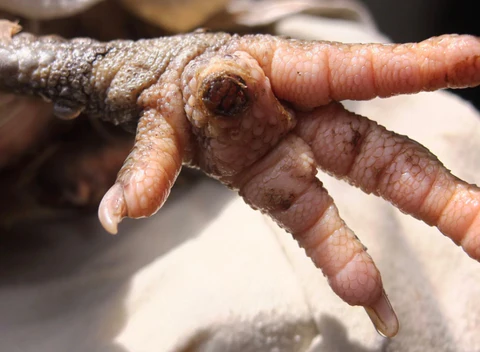
Bumblefoot is a bacterial infection that causes necrotic lesions on footpads, hocks, and toes of backyard birds. It can affect one foot or both feet. Whenever there is a cut or abrasion on the skin, the bacteria can enter the wound and cause an infection to form. The staph infection causes a hard core to form that looks like an abscess or kernel. It can vary in severity, but it is always best to act fast to prevent the infection from spreading. See more information and photos of bumblefoot here.
What Happens If I Do Not Treat Bumblefoot?
Bumblefoot is a serious and contagious infection that requires prompt treatment. If the infection is left untreated, it may spread to the bloodstream and become fatal. It can also spread quickly to other chickens in the flock.
How to Treat Bumblefoot in Chickens Step by Step
With a few basic tools and steps, you can successfully treat a bumblefoot infection.
What you will need:
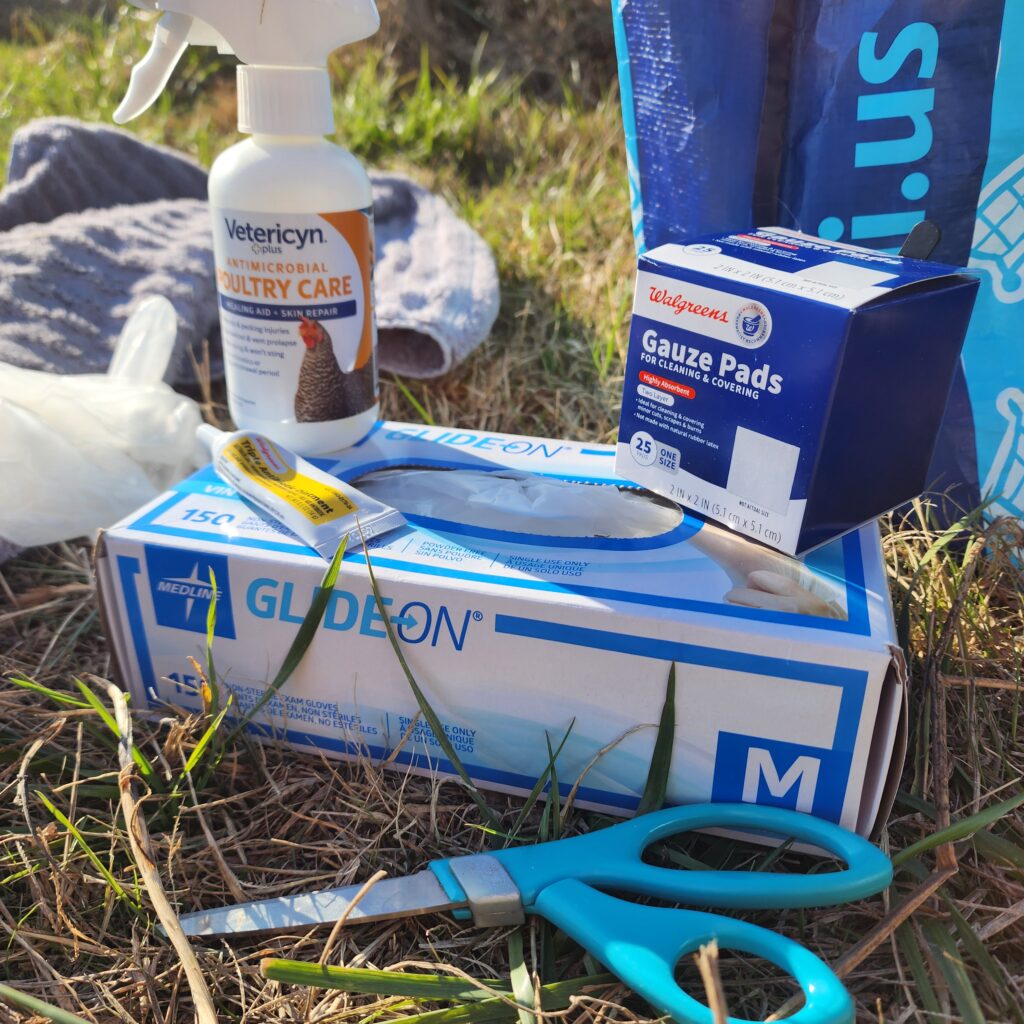
Steps to Treating A Bumblefoot Infection
- ISOLATE YOUR CHICKEN. When you first start treating a bumblefoot infection, it is important that you begin by isolating your hen. Bumblefoot is quite contagious so you will want to keep your bird away from the others (I brought my sweet Anna inside with me for the first 4 days of treatment.) During this time, you will be treating your chicken daily to help facilitate the healing process. Chickens are very social creatures so isolation can make them a bit lonely and bored. Make sure to give your bird some attention throughout the day and also plenty of treats to help them through this time period. I gave Anna her favorites, apples and tomatoes!
- SOAK THE FEET. Fill a tub with enough water to cover the feet. You want the water warm but not hot. You don’t want to further irritate your chicken’s feet. Add about a quarter cup of plain Epsom salt into the warm water and mix until dissolved. You’ll want to put on gloves as bumblefoot is highly contagious and can spread to humans. Gently place your bird’s feet into the tub and let soak for 15 minutes. The Epsom salt helps to draw out the infection and soften the skin for the next step. The first bird I treated, I used a hospital foot bath we had on hand and wrapped my hen in a towel to help keep her still and from preventing her from trying to fly away. This method works very well however, I have found that using a 5 gallon bucket is much easier and comfortable.
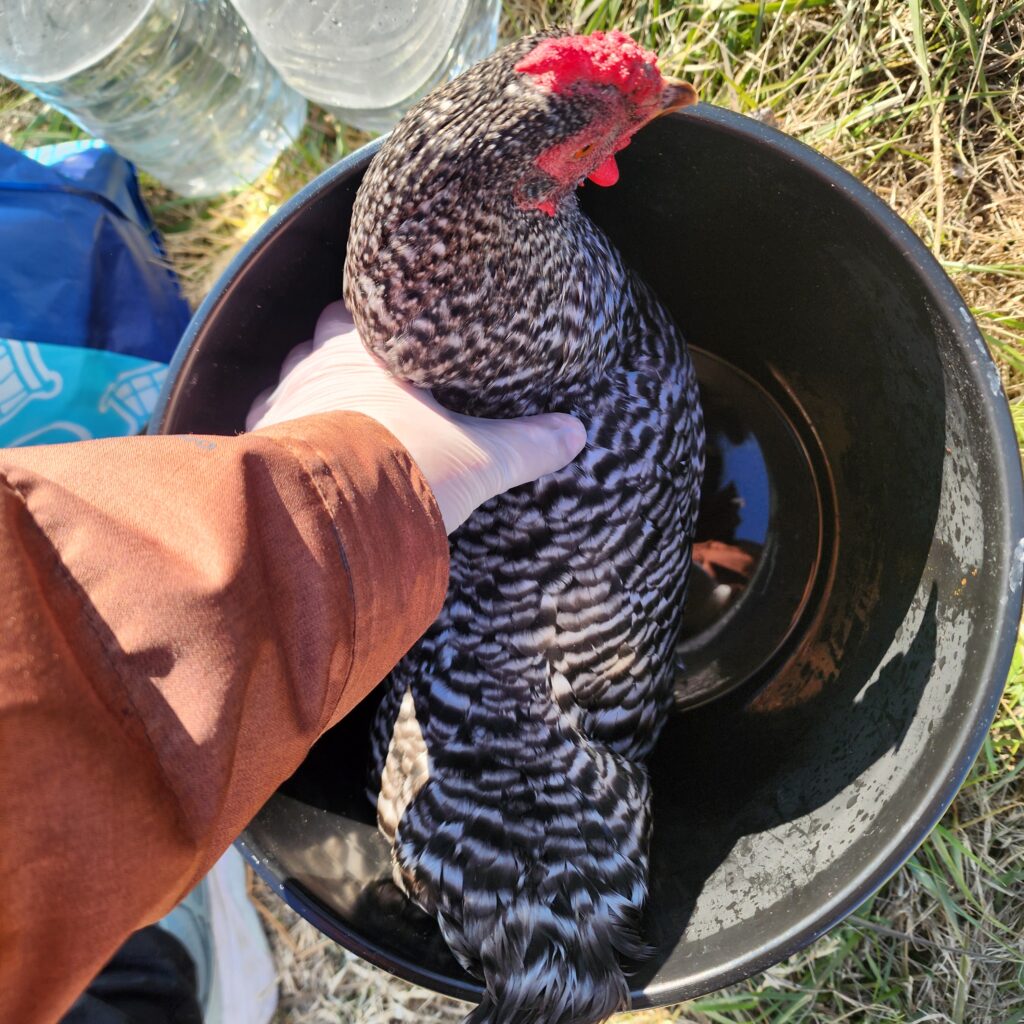
I placed a towel over the top with just enough room for her head to poke out. Isn’t she so pretty?
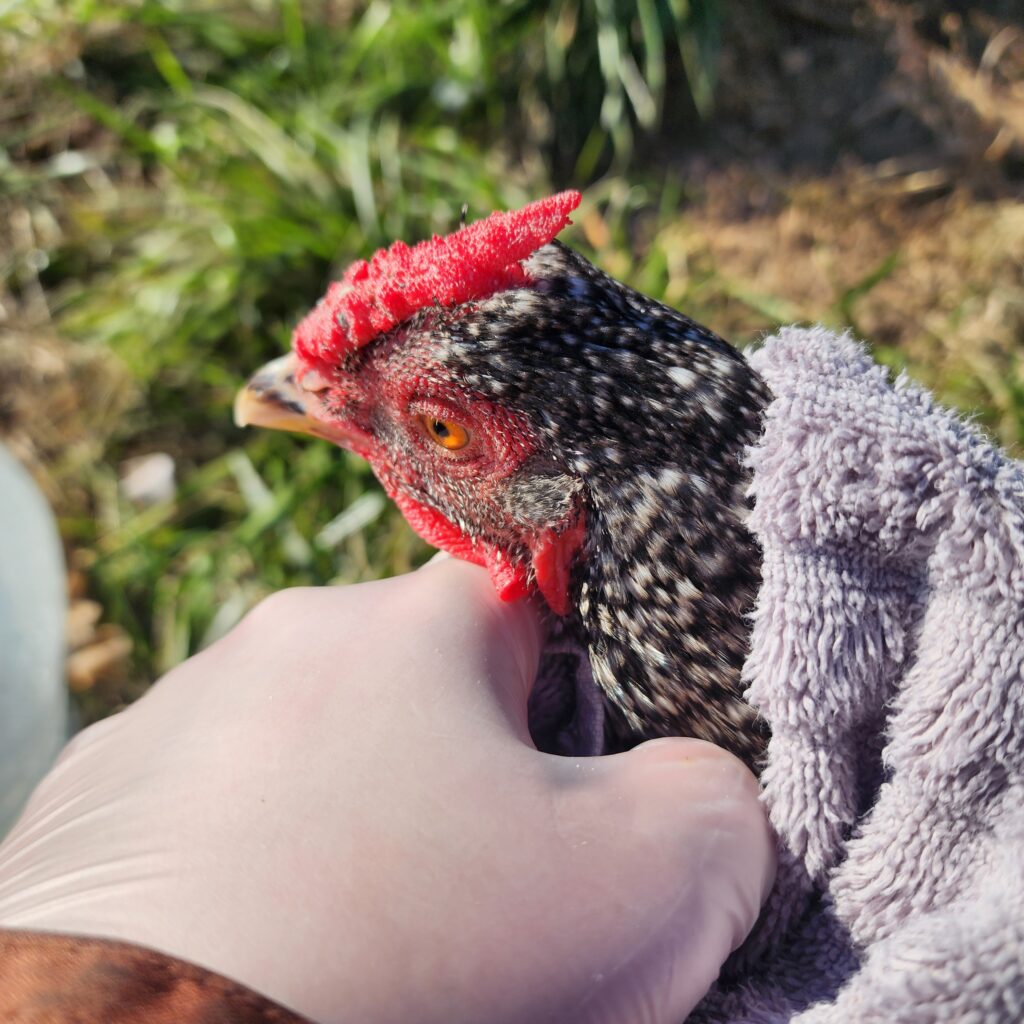
The view wasn’t so bad either. I petted her and she started to fall asleep. Chickens can be such sweet animals!
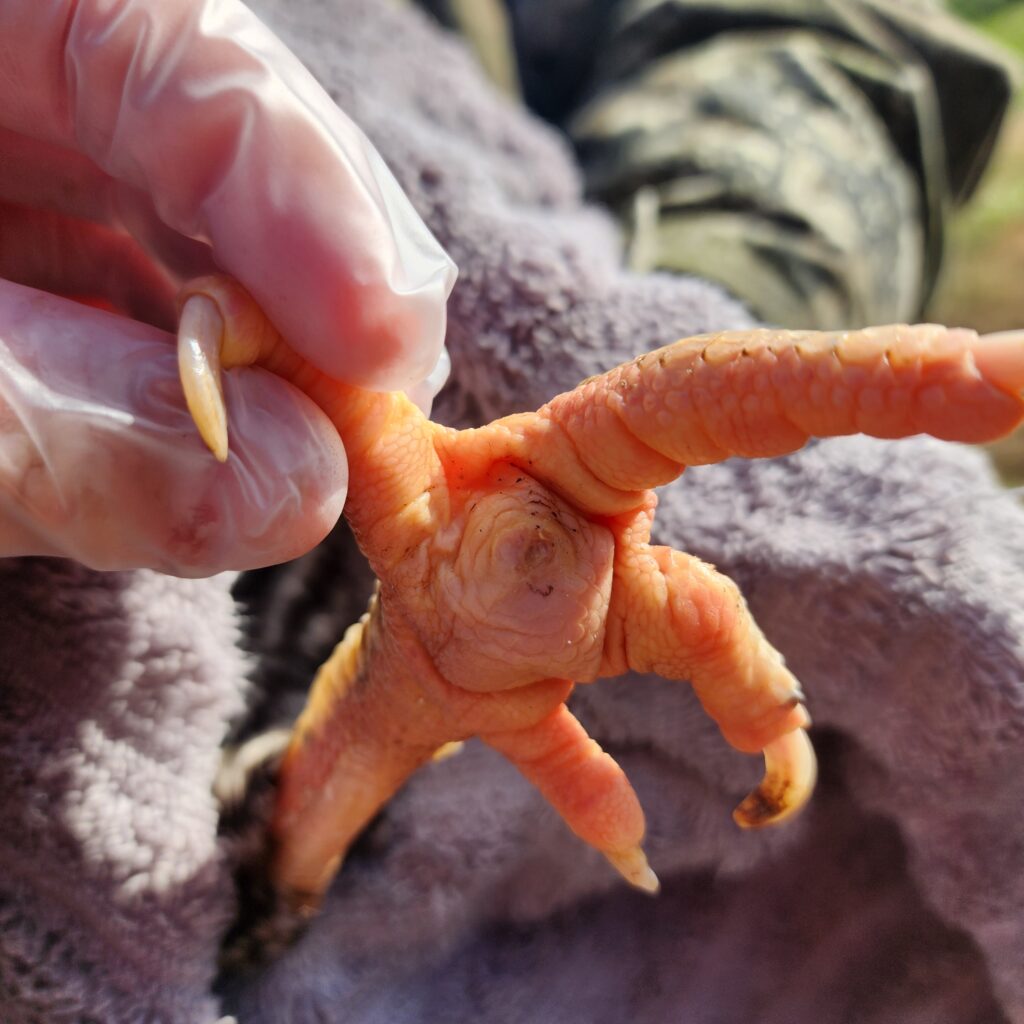
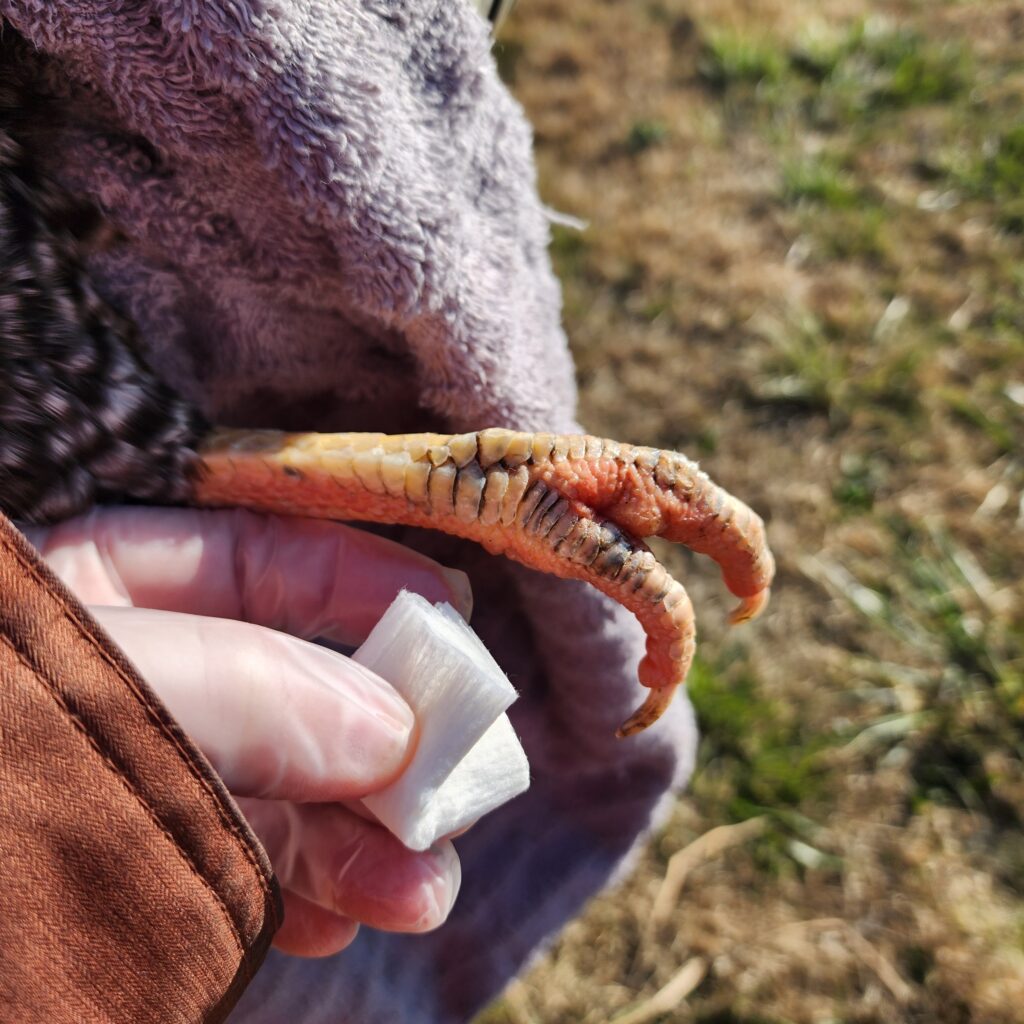
3.REMOVE THE BUMBLE. Remove your chicken from the foot bath and dry the feet. These next steps you’ll want some help to make it an easier and more comfortable situation for both you and your chicken (I wrapped Anna in a towel, leaving her feet exposed, and handed her to my boyfriend so he could hold her while I treat her.) After drying the feet, take the tweezers and pick away the bumble in the foot. BE GENTLE. If the core does not easily remove itself, you may continue to soak until it softens enough to fully remove. The infection is a hard mass of tissue. You want to remove it all until you’re left with pink skin. Here is a helpful YouTube video that will walk you through the process! They used a drawing salve. Anna’s infection was not too bad so we did not require this step.
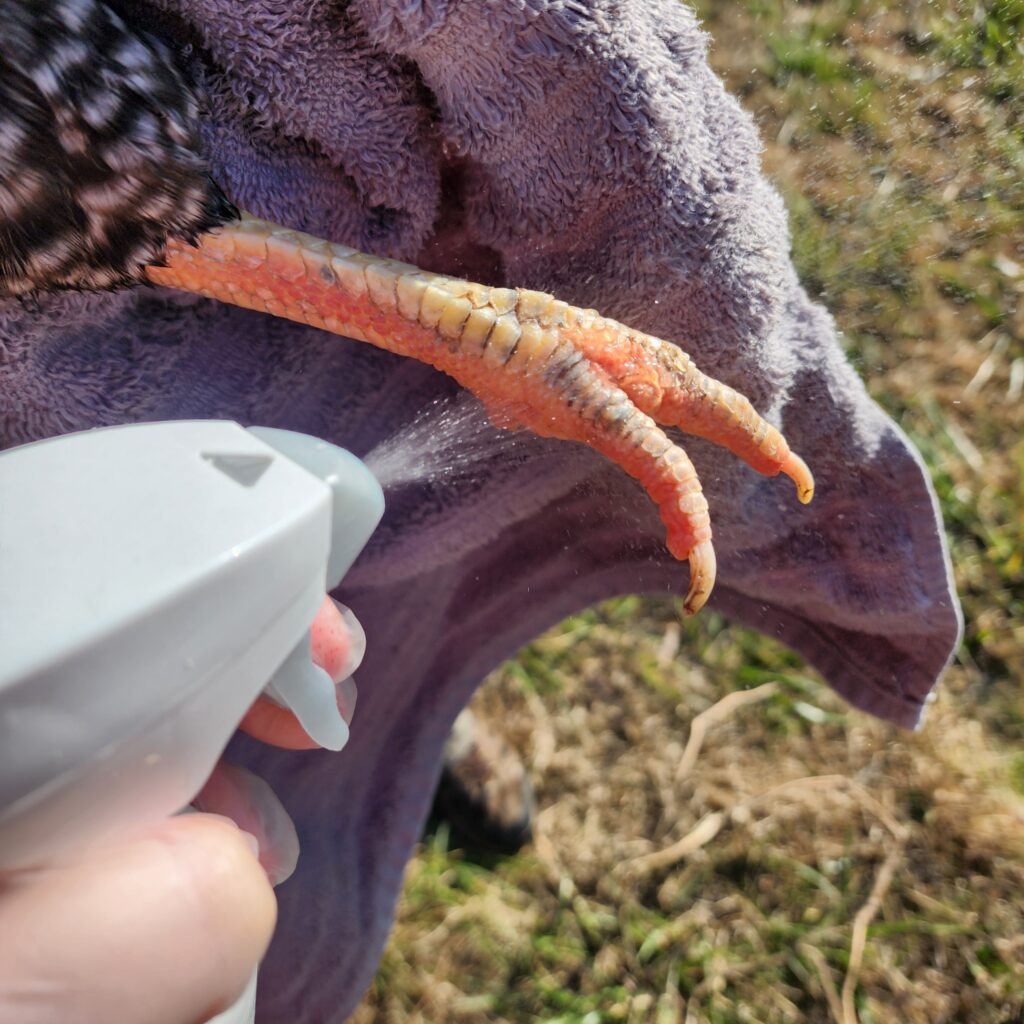
4. APPLY THE VETERICYN SPRAY. Generously spray all parts of your chicken’s foot. You may do this before or after you remove the bumble. Make sure to dry the foot thoroughly so moisture does not get trapped in the bandages. You will want your chicken’s feet to remain as clean and dry as possible throughout the healing process.
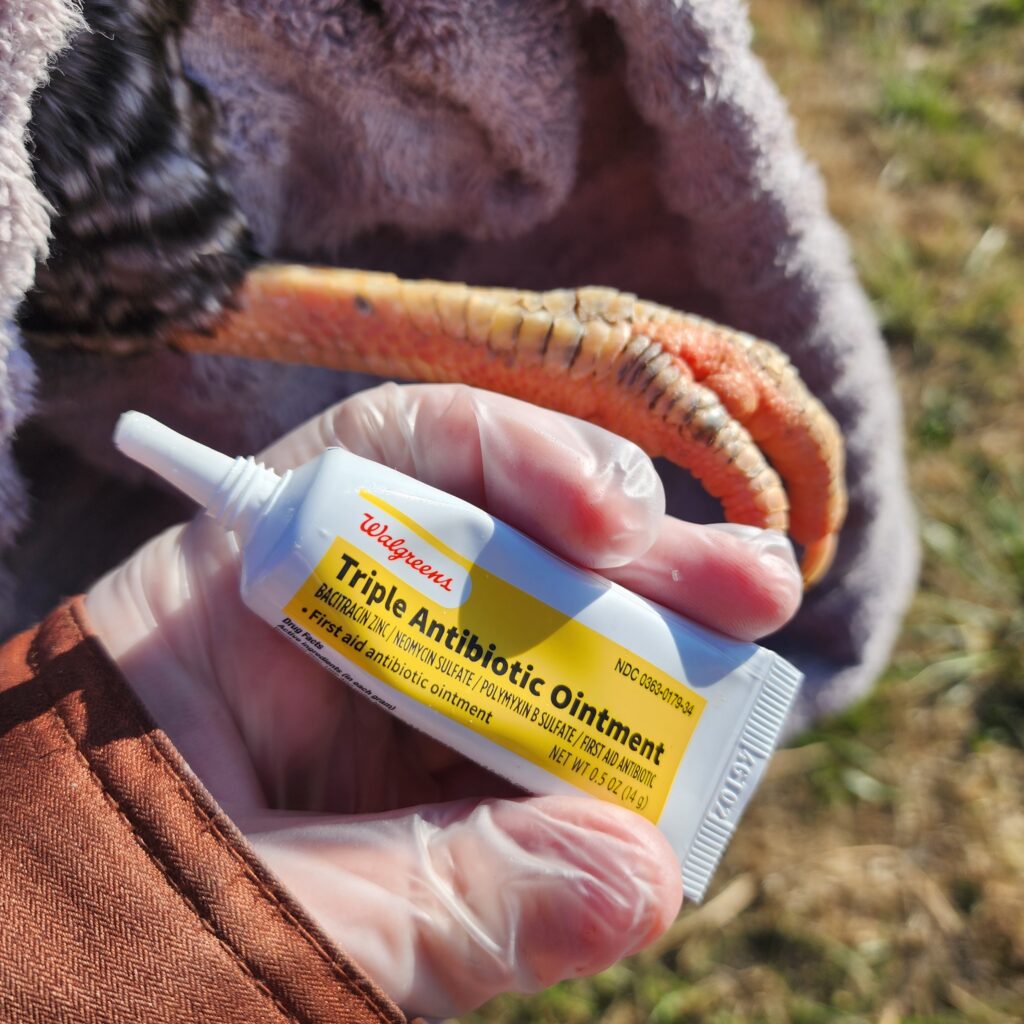
5. APPLY THE TRIPLE ANTIBIOTIC OINTMENT. Apply a generous amount of ointment on the bumble and surrounding tissue to help treat the infection. You will want to use the kind WITHOUT pain relief as this is extremely toxic to chickens!
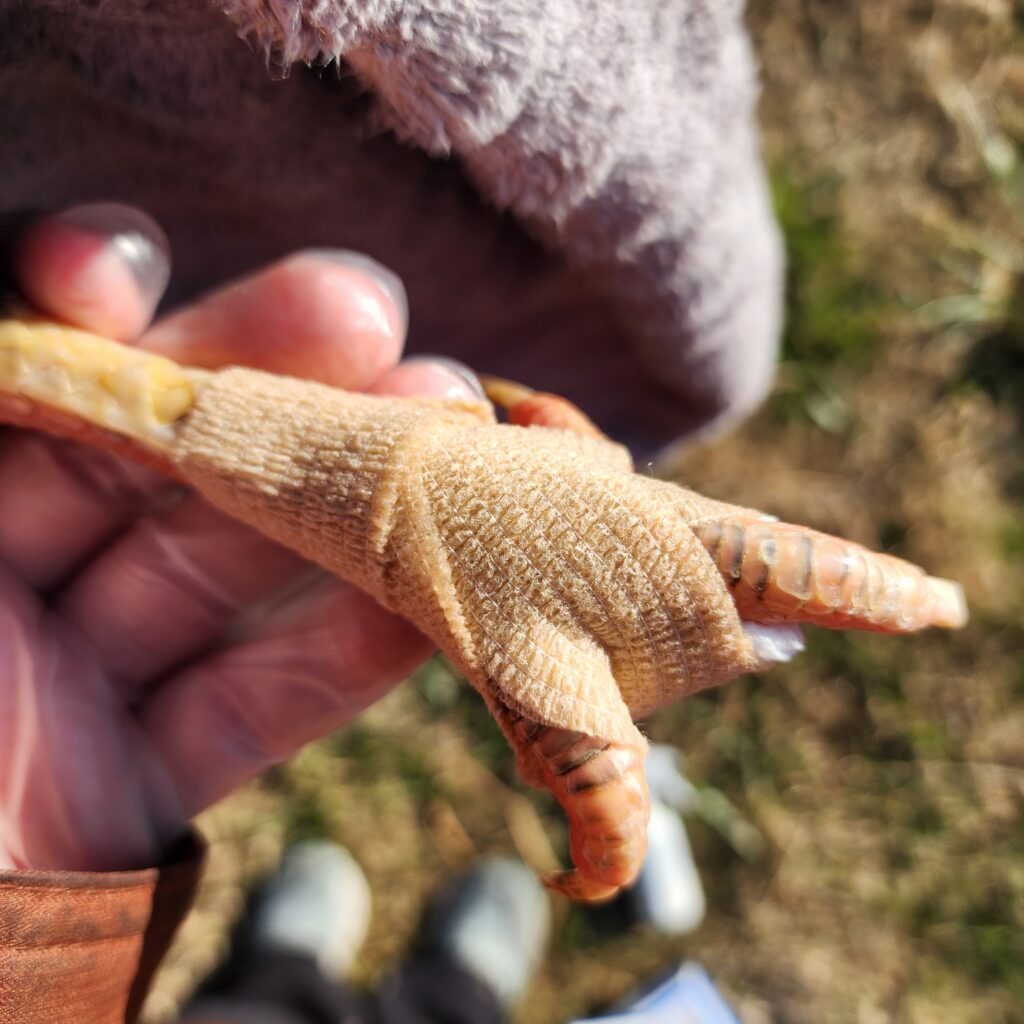
6. BANDAGE THE FOOT. Take a 2″x2″ piece of gauze and fold it in quarters. Place underneath the foot pad. This will provide good cushion and protect the feet from harm. Then, take the self-adhering elastic bandage and gently wrap the the foot in a figure 8. You will want to make sure you do not wrap too tightly and that the claw is still exposed.
Do this every day for 4 days (if the infection is very severe, do this for longer) and then 3 times per week until the infection is fully resolved. It can take weeks to months for a bumblefoot infection to fully heal so be patient!
Natural Remedies and Tips for Healing Bumblefoot in Chickens
How to Prevent Bumblefoot in Chickens
The best way to deal with bumblefoot is to keep it from happening in the first place. Prevention goes a long way toward keeping your flock healthy:
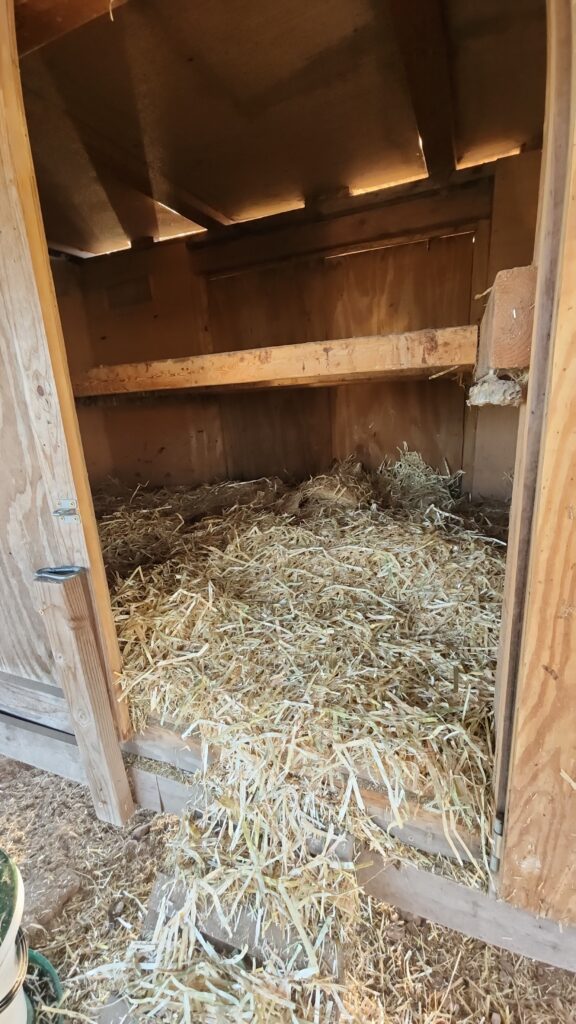
- Use soft, clean bedding like pine shavings, straw, or sand.
- Keep roosts smooth, not sharp, and avoid heights that strain chicken feet when they jump down.
- Regularly clean the coop to prevent bacteria buildup.
- Trim nails and spurs if they grow too long and cause scratches.
- Maintain a balanced diet to support overall immune health.
Frequently Asked Questions About Bumblefoot in Chickens
Can you treat bumblefoot in chickens at home?
Yes, most mild to moderate cases of bumblefoot can be treated at home using soaking, cleaning, and bandaging. Severe cases may require a vet if available.
Is bumblefoot contagious to humans?
Bumblefoot is caused by staph bacteria, which can infect humans. Always wear gloves when treating it.
How long does it take for bumblefoot to heal?
Milder cases can heal in a few weeks, while severe infections may take several months of regular care.
How do you prevent bumblefoot in chickens?
Prevention includes soft bedding, clean coops, smooth roosts, and good nutrition. Keeping the environment safe and dry is key.
Final Thoughts
Anna is now back in the coop with her flock mates and feeling great! Apply these steps with your chicken, and they soon will be too. And if you’re ready to expand your homesteading skills beyond chicken care, don’t miss my free guide, The Art of Sourdough. You’ll find it waiting in my resource library just for email friends. I will post more about this at the bottom of this post!
DISCLAIMER: I am not a licensed veterinarian. I am telling you what has worked well for me and based on my research. If an infection does not respond to this treatment, please contact a veterinarian. Oral antibiotics might be needed.
SHOP OUR COOP FAVORITES ON AMAZON
Find all our tried-and-true coop favorites on Amazon.

More Backyard Chicken Posts You Might Enjoy
Take a peek at more chicken-keeping tips and cozy backyard inspiration.
From Our Homestead to Yours
Here are more homesteading stories, tips, and cozy ideas to inspire your own simple living journey.


Discover the Art of Sourdough
If you’ve ever wanted to pull a warm, crusty loaf of bread from your own oven, sourdough is such a rewarding place to start. I put together a free guide called The Art of Sourdough that walks you through the basics so you can feel confident feeding a starter, baking your first loaf, and enjoying the simple beauty of homemade bread. You’ll find it waiting in my resource library for email friends, and I’d love to share it with you.

Let’s Get Social!
Let’s stay in touch! Follow me on my other platforms for more cozy inspiration, tips, and little glimpses behind the scenes!